Hello Friends if you are looking for SAP S4 HANA Configuration BP | BP SAP S4 HANA Configuration | SAP S4 HANA Business Partner Configuration Notes | SAP S4 Hana BP Configuration | SAP Hana Business Partner Configuration with Notes | SAP BP Configuration with Notes
What is Business Partner in SAP?
A Business Partner can be a person, organization, group of people, or a group of organizations, in which a company has a business interest. It is the single point of entry to create, edit, and display the master data for business partners, customers and vendors. A Business Partner consists of general data like name, address, bank information, etc. as well as role specific information i.e. customer/vendor/employee data.
Why we have to use Business Partner?
There are following reasons that is why we have to use BP –
- Data Redundancy: A person can be a Vendor as well as customer, in traditional
ERP we have to create two objects. With business partner single object is only
required. - Multiple Transactions: To create vendor or customer we have to go to different
transactions. With Business Partner single transaction “BP” is required both
objects. - Note: Centrally managing master data for business partners, customers, and
vendors.
Customer and Vendor Integration to Business Partner
In Traditional ERP, we have Customer and Vendor as different object.
For Customer, we have following views:
- General
- Finance
- Sale
For Vendor, we have following views:
- General
- Finance
- Purchasing
For creating their objects, we need different Transaction code:
Customer: XD01, FD01, VD01
Vendor: XK01, FK01, MK01
What is Vendor Master Data Configuration in Business Partner ?
Define Vendor Account Group
Vendor account Group– When creating a vendor master record, you must decide the
account group to which you are assigning this vendor. The account group has the functions to control the screens and fields relevant to your business partner that are displayed and are enabled for input.
Among other tasks, the account group performs the following functions:
● Determines the type of number assignment, such as internal or external
● Determines the number range. The system identifies the account number from this number
range to be assigned to the vendor
● Determines the field selection, such as which fields are ready for input, which fields must
be maintained, and which fields are hidden
● Determines the valid partner schema
● Determines the vendor’s status, for example, if the vendor is a one-time vendor or a
permanent vendor
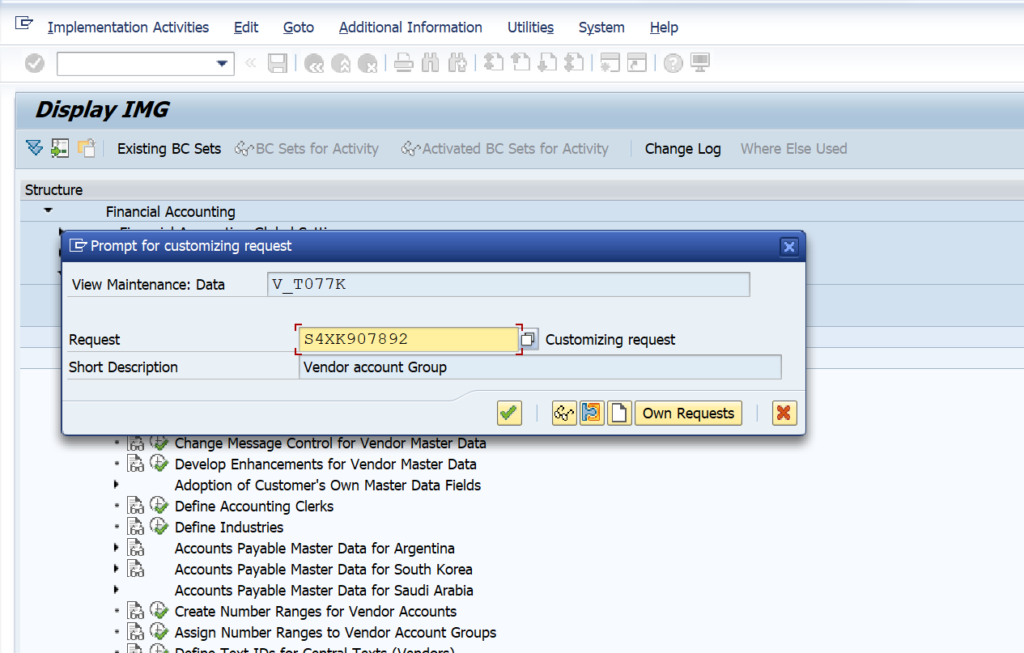
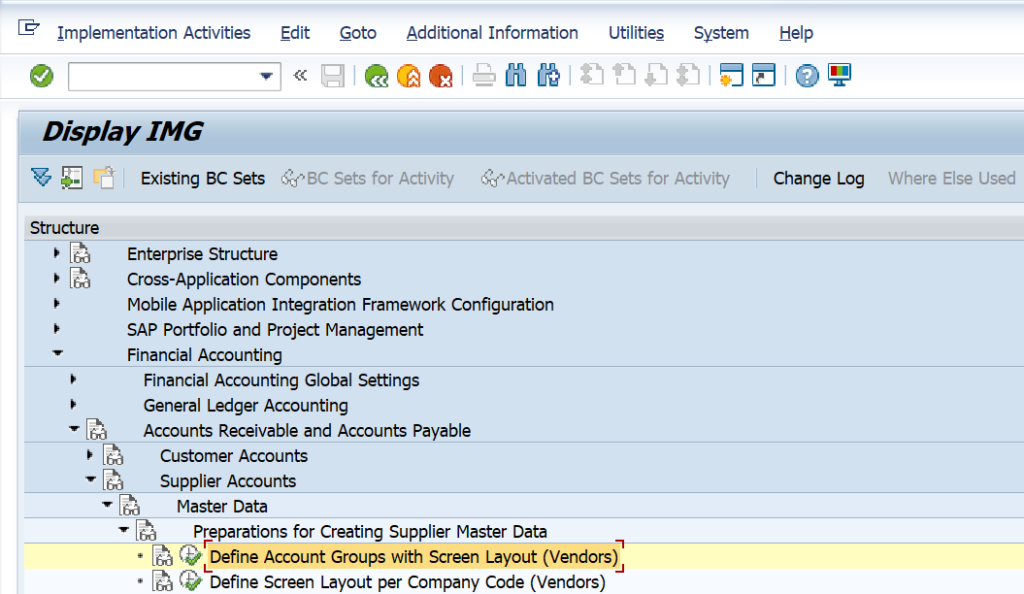
We have to Open Tcode – OBD3 or else Follow the Menu Path as given below –
SPRO > SAP REF IMG > FINANCIAL ACCOUNTING > ACCOUNTS RECEIVABLE AND ACCOUNTS PAYABLE > SUPPLIER ACCOUNTS > MASTER DATA > PREPARATIONS FOR CREATING SUPPLIER MASTER DATA > DEFINE ACCOUNT GROUP WITH SCREEN LAYOUT (VENDORS)

Click on Define Account groups with screen layout(vendors) and click on New Entries
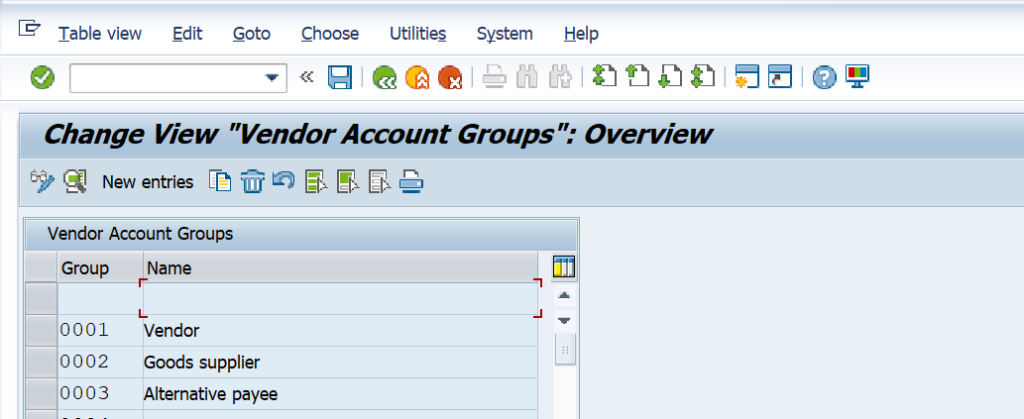
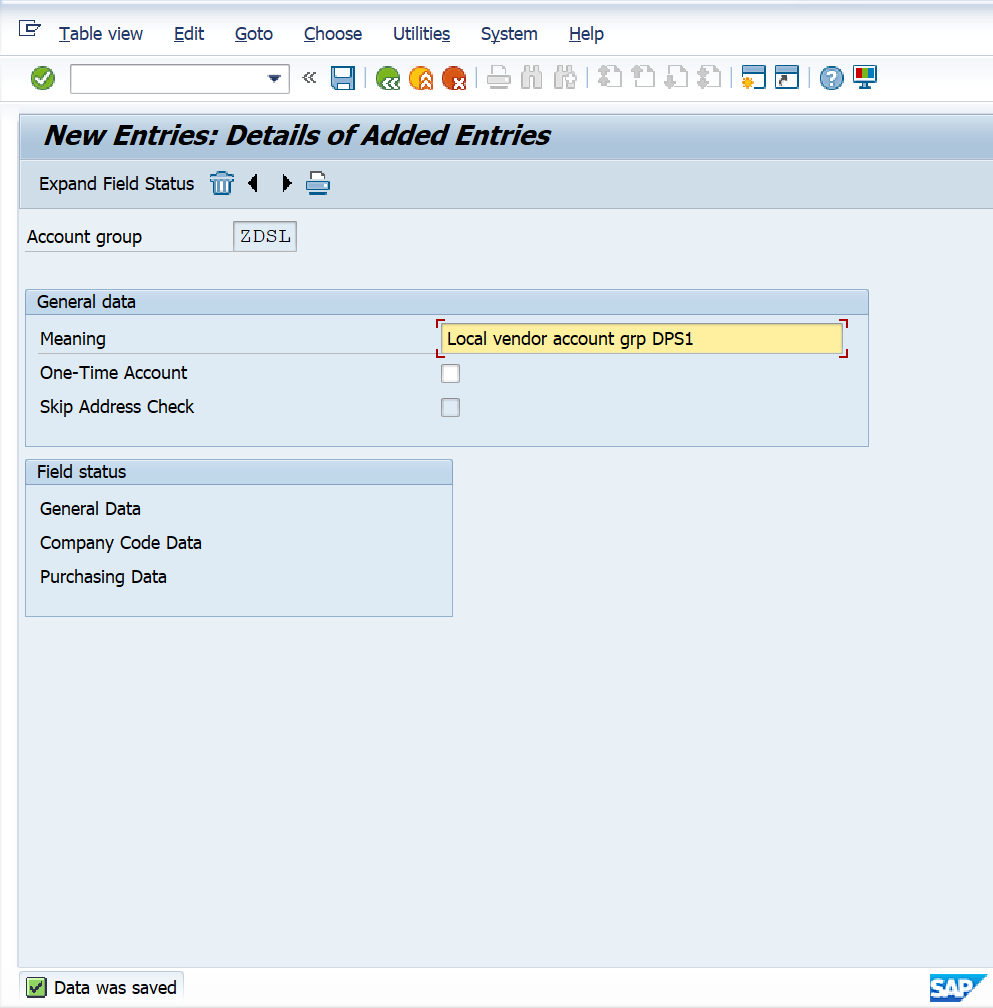
After clicking on new entries enter your Local (domestic)vendor account group (ZDSL) and meaning and click on Save button.

After Saving vendor account group, System show Message data was saved
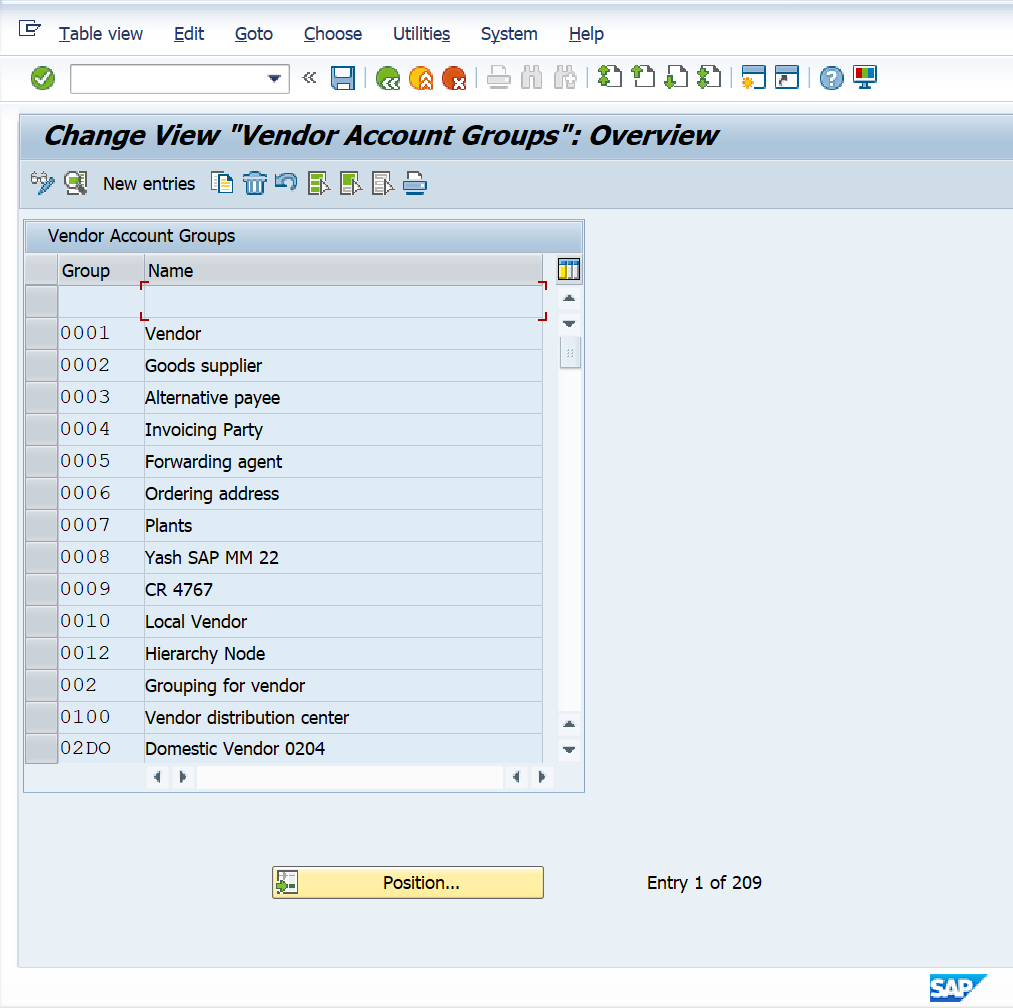
So, here Defined Local (Domestic) vendor account group. Now, Define vendor account group for Foreign vendor and one-time Vendor.
Now define Vendor account group for Foreign Vendor

Click on New entries
Now Enter here Foreign Vendor account group (ZDSF) and click on save
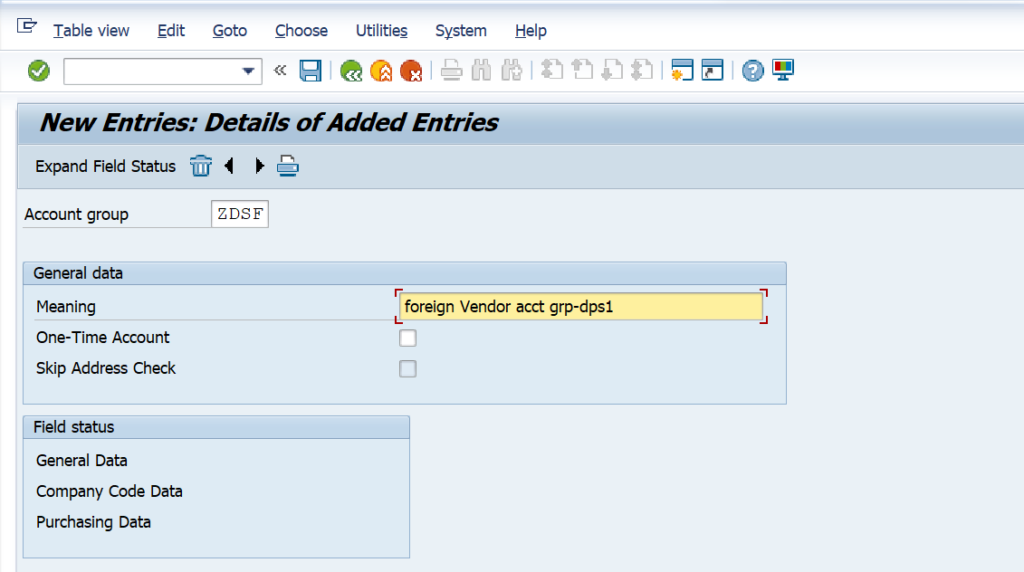
Click on Save
After saving, Data Saved

Now, Define one-time vendor account group
One-Time Vendor: One-time vendor can be used for vendor that is only used once or very rarely.
For example, you may need a material in an emergency, and perhaps your normal vendor for that material can’t supply the item in the requested time. In this instance a local vendor or an unapproved vendor may be used for this one-off purchase.
A one-time vendor record can be created in the same way as any normal vendor by using Transaction BP. The difference is that a one-time vendor uses a special account group. One- time vendor records don’t usually contain any significant data or any bank and financial information. Many companies have policies in place to ensure that vendor master records aren’t created for one-time or limited-use vendors. Some of these policies may include establishing a limit on the number of transactions per year and restricting the yearly spend on these vendors. For example, if a vendor has more than four transactions a year, or if the total annual spending with a vendor is more than $4,000, then company policy could require that a vendor master record be maintained for that vendor instead of that vendor being treated as a one-time vendor only.
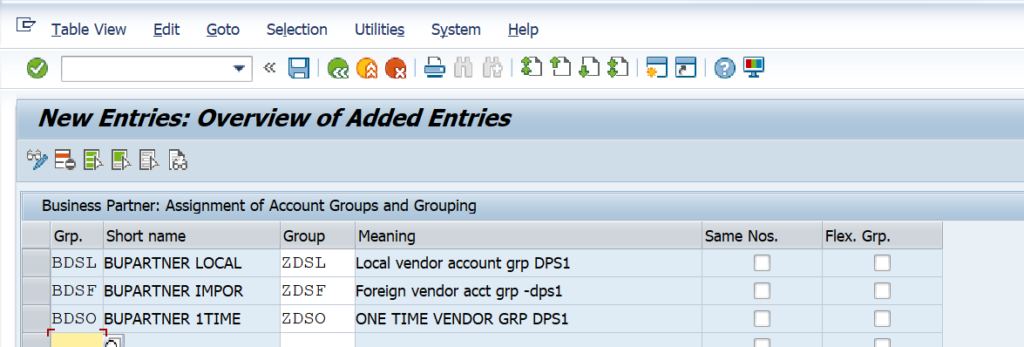
Click on New Entries

Enter here ZDSO as One-Time Vendor Account Group and mark checkbox of one-time
account and Save

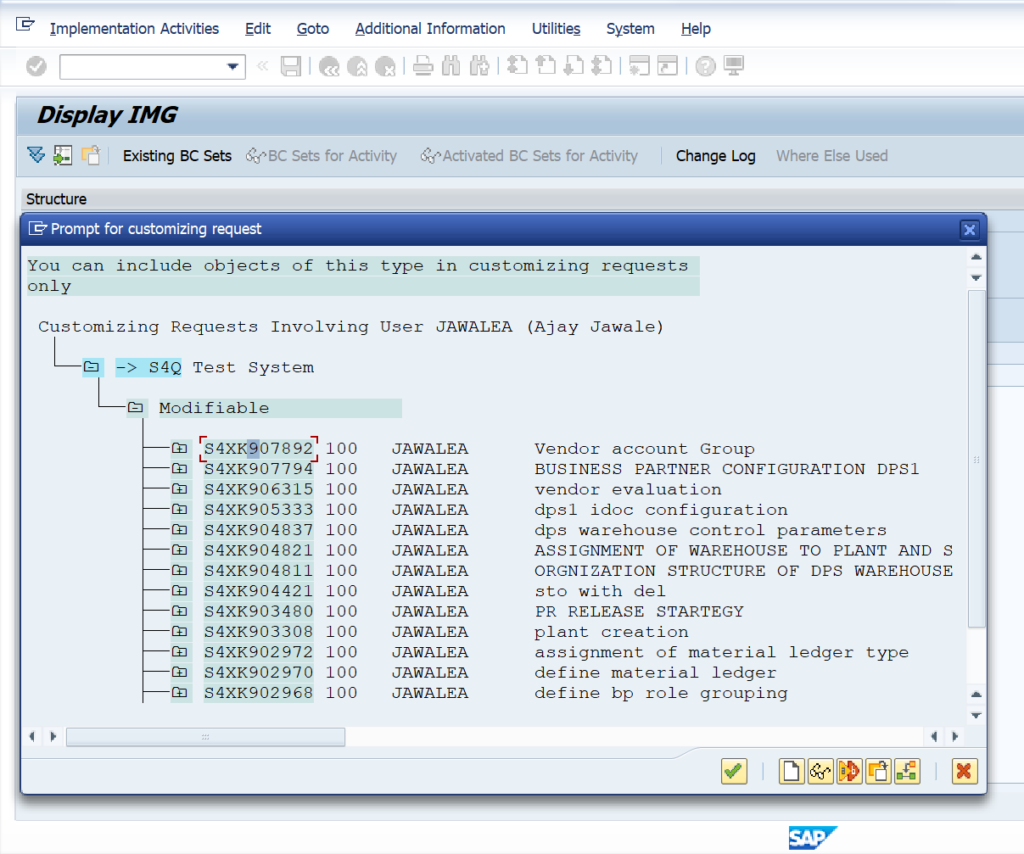
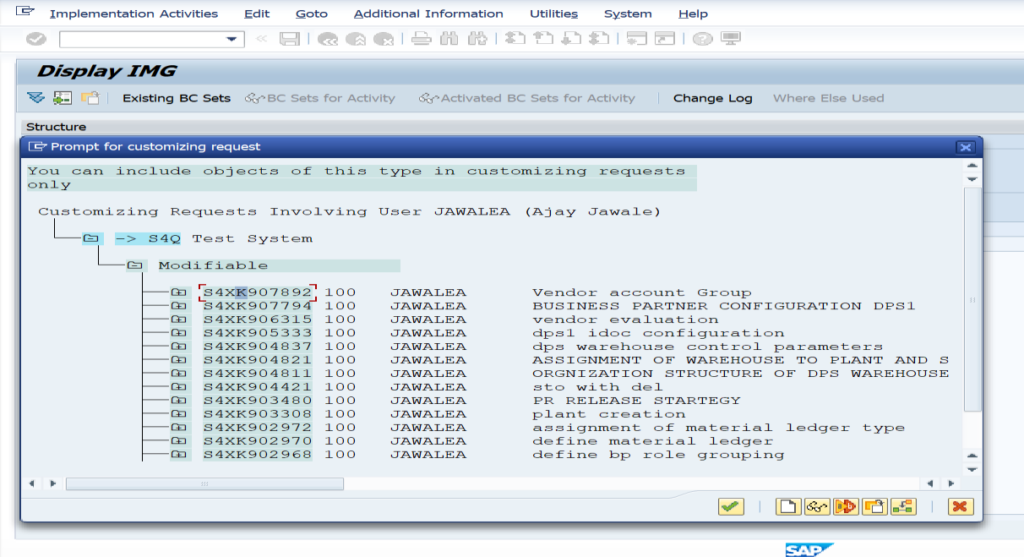
Save transport request
After Saving, One -time vendor account group data saved.

Define Number Range for Vendor account groups in Business Partner
When defining vendor number ranges, remember that vendor numbers, like Materials
numbers, can be externally or internally assigned
- Internal Number Range-system will assign the numbers based on the number interval you have assigned
- External Number range-the user has to manually assign the numbers based on the
number interval you assign
Use TCode – XKN1
Menu Path – SPRO > SAP REF IMG > FINANCIAL ACCOUNTING > ACCOUNTS RECEIVABLE AND ACCOUNTS PAYABLE > SUPPLIER ACCOUNTS > MASTER DATA > PREPARATIONS FOR CREATING SUPPLIER MASTER DATA > CREATE NUMBER RANGES FOR VENDOR ACCOUNTS
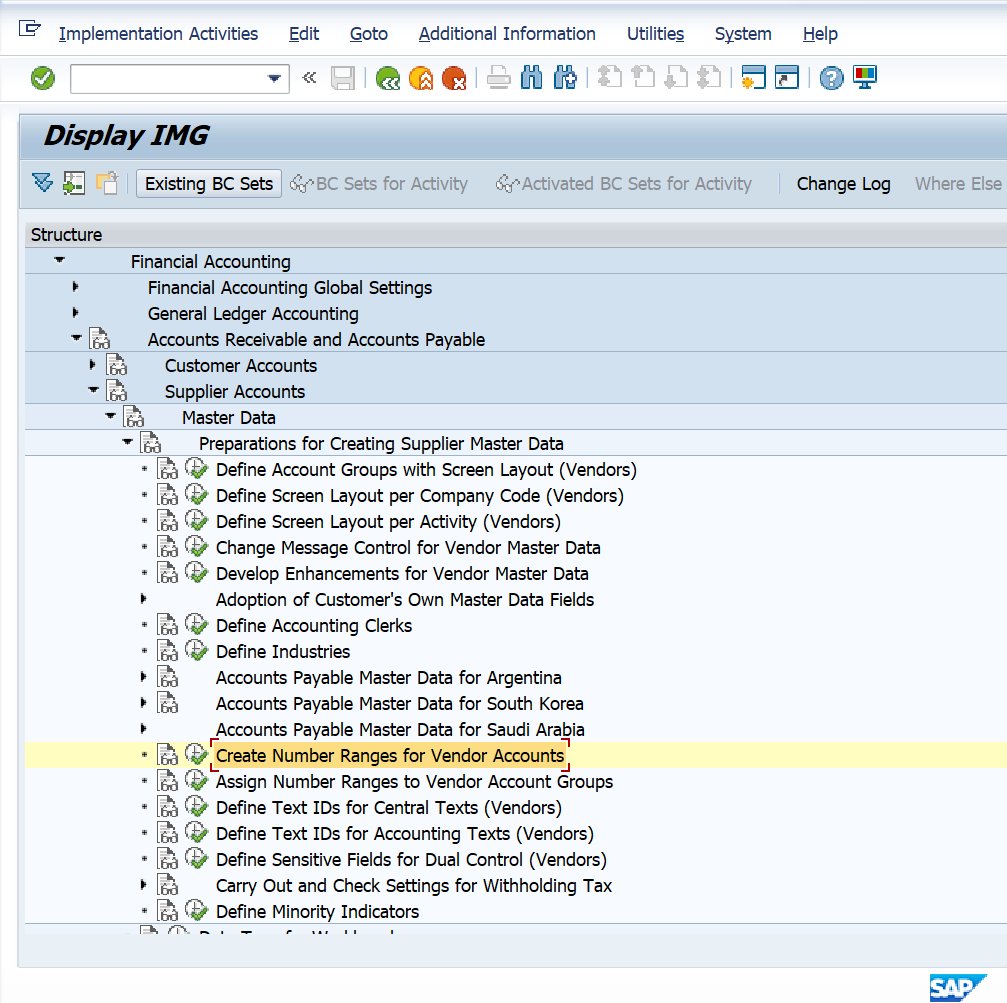
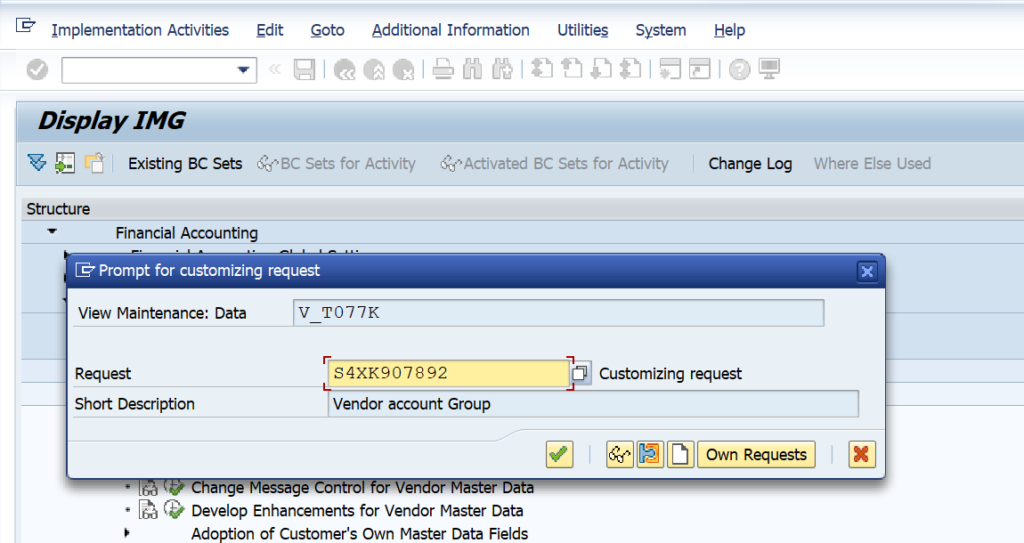
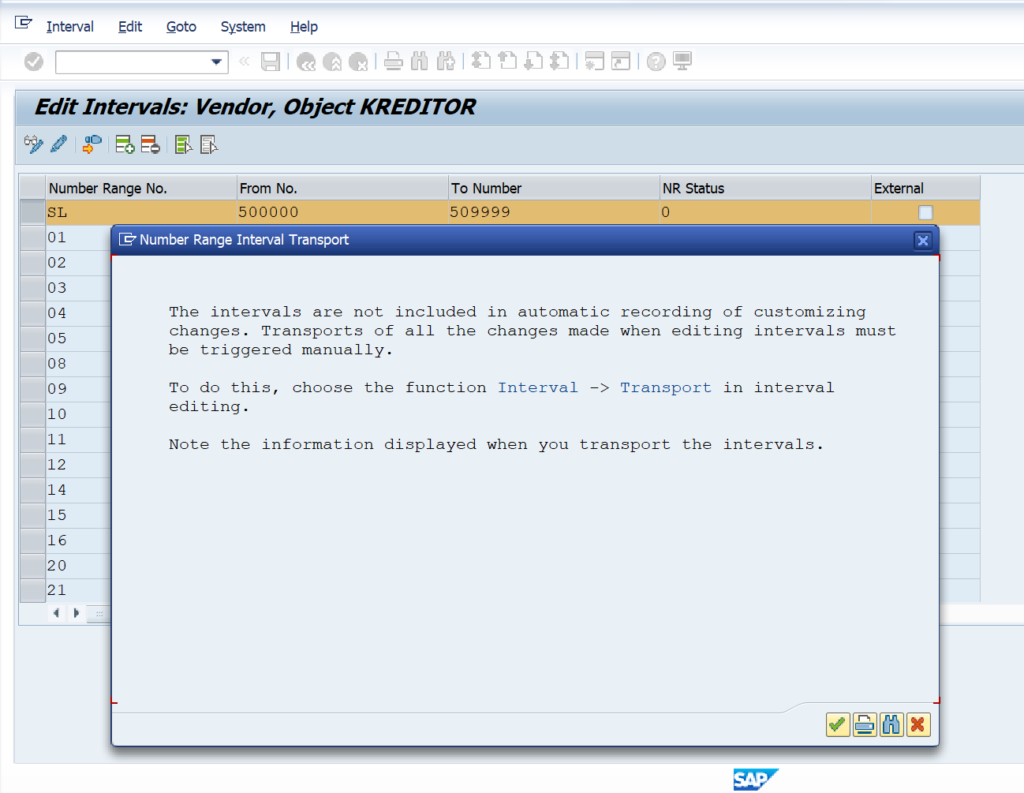
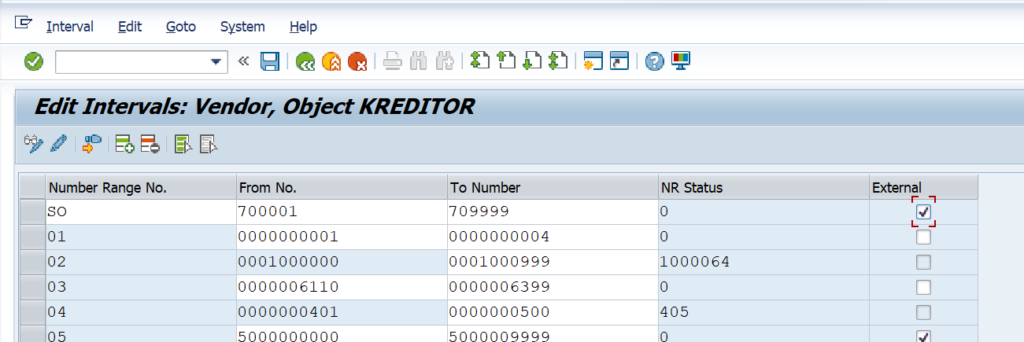
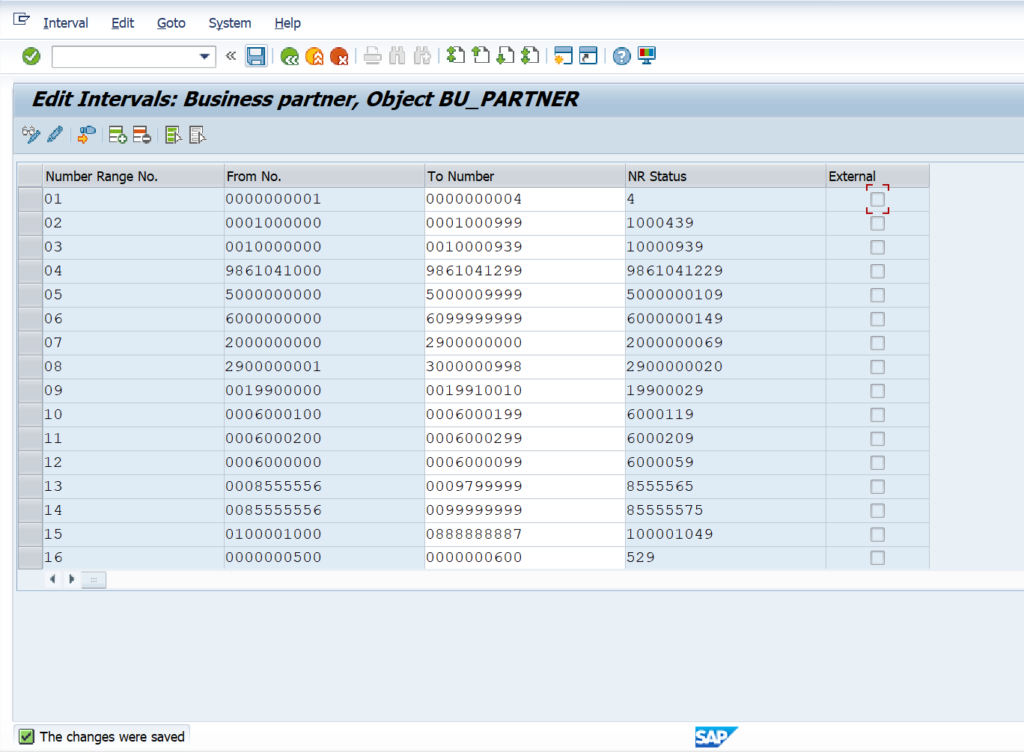
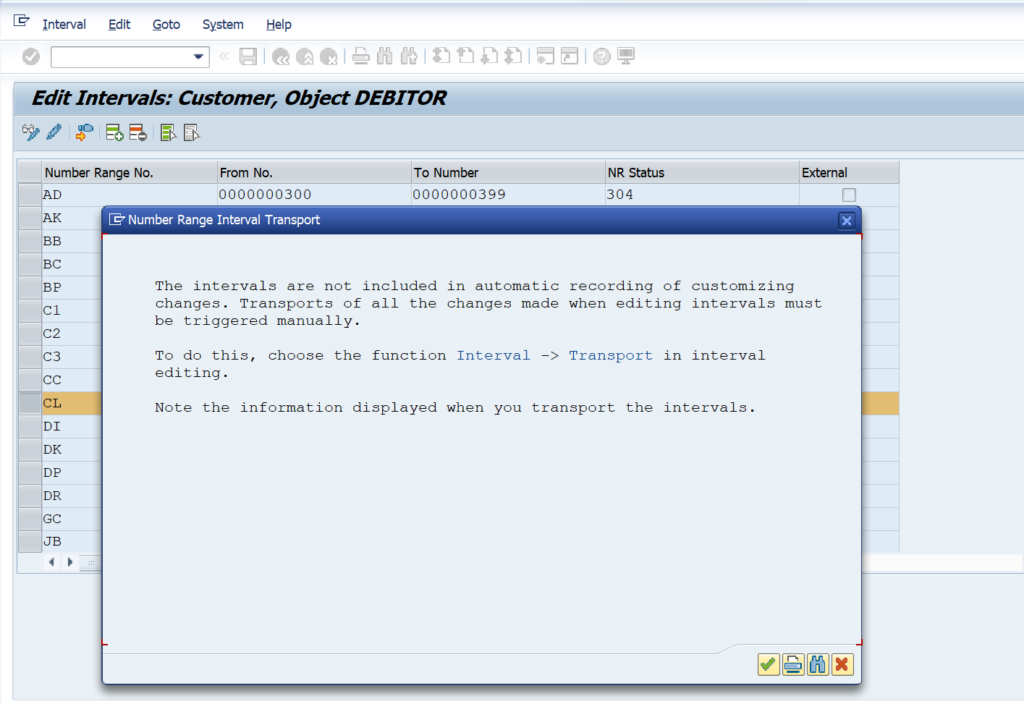
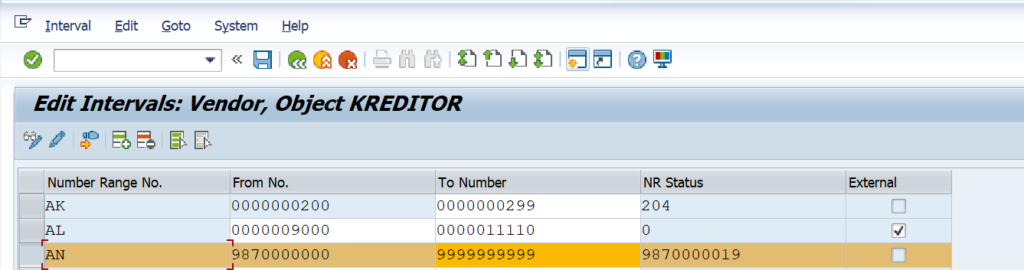
After clicking on create number range, click on the intervals
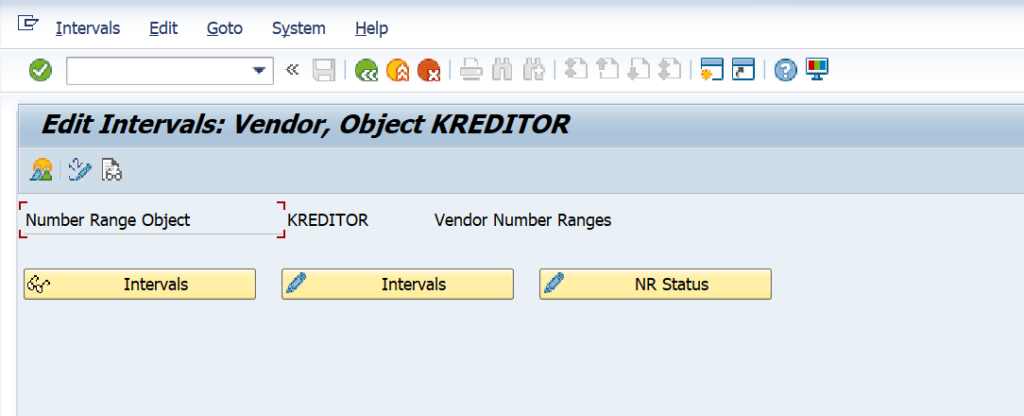
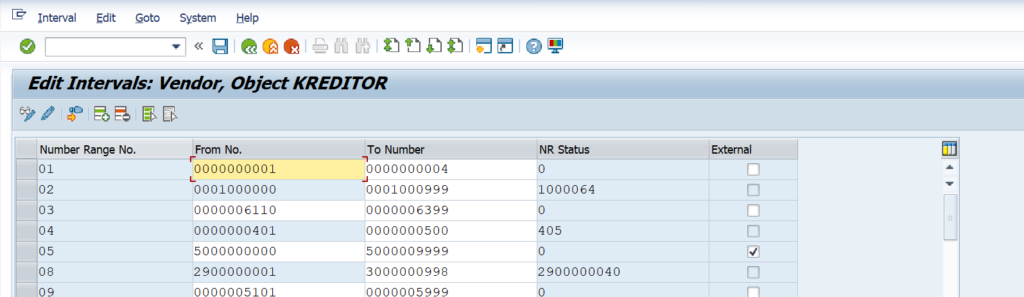
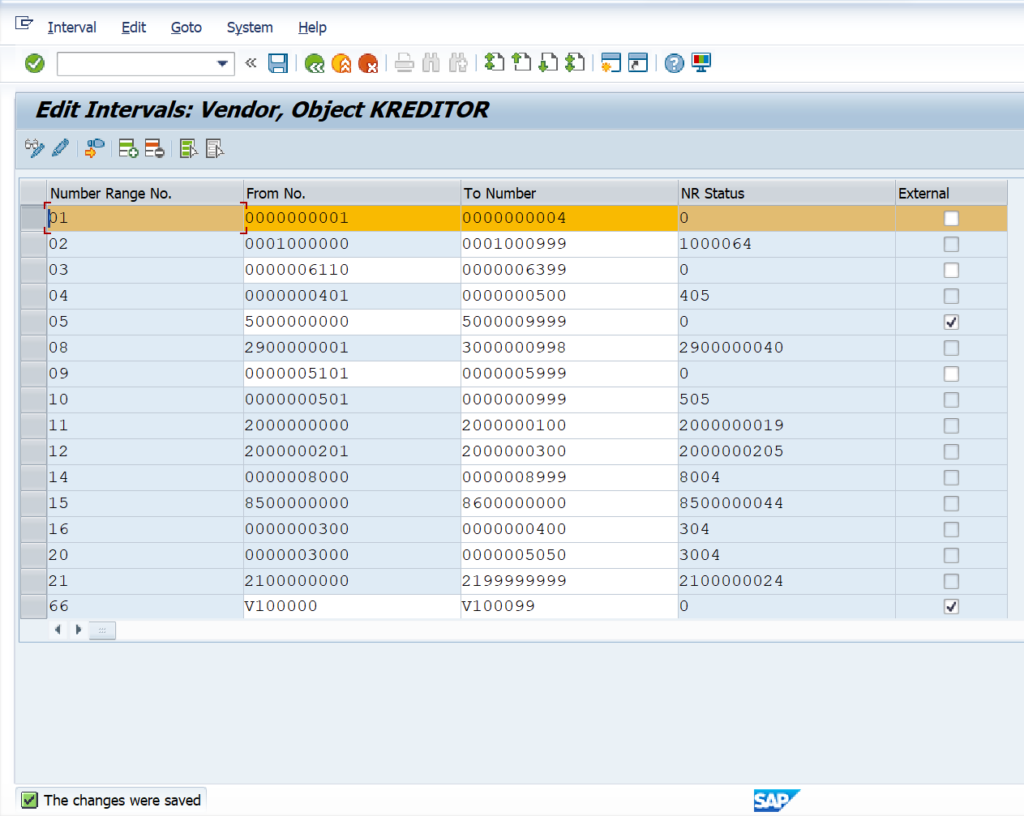
Now, edit intervals for vendor screen is open, click on the icon insert line and Maintain
number range as per business requirement and Save the data.

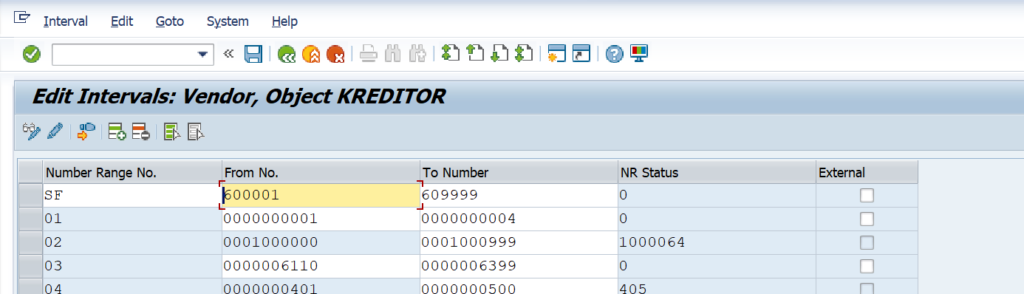
Same way define number range for foreign vendor and one-time vendor account group
and save the number ranges
After saving click on ok tick mark and Number range data saved.
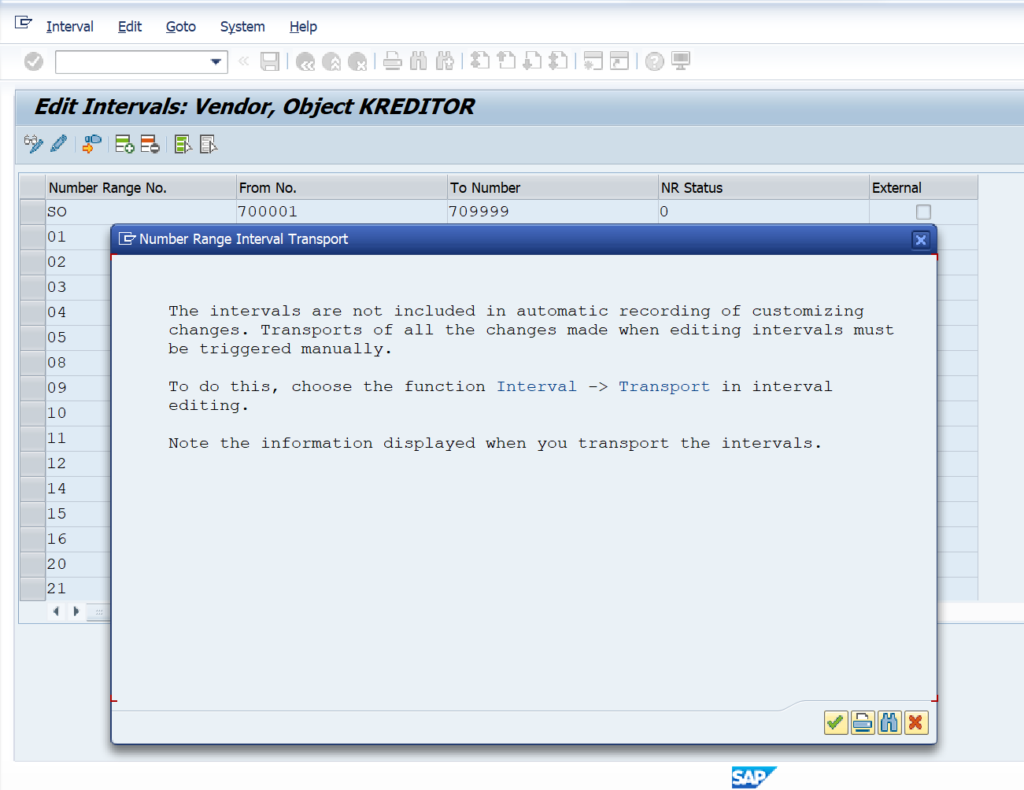

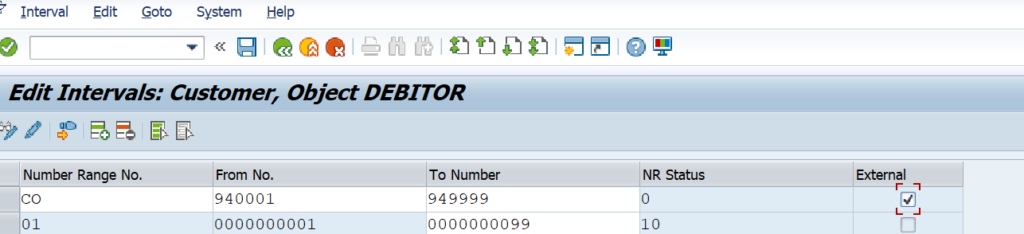
One-Time Vendor account group number range (external number range).
After saving click on ok tick mark and Number range data saved.


Assigning Number range to Vendor Grouping
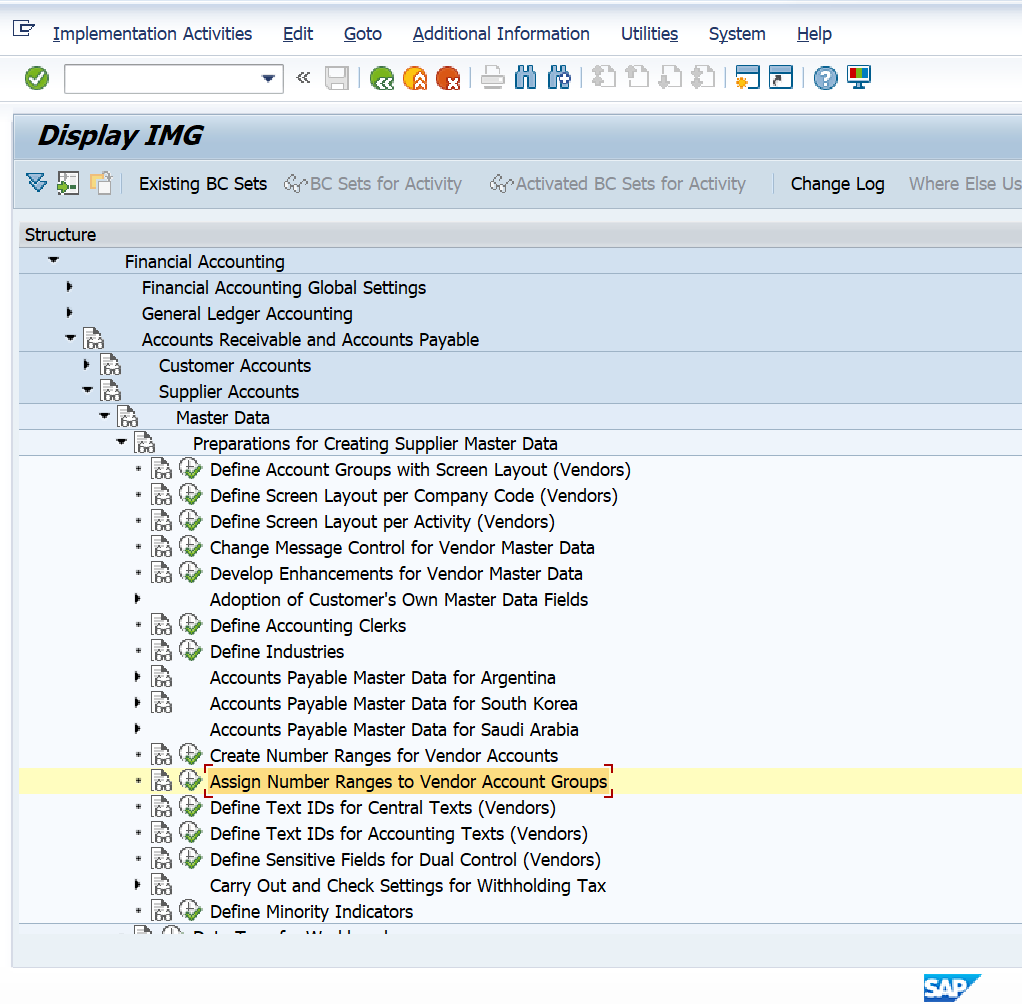
For Assigning Number Range to Vendor Group we have to Open TCode – OBAS Or Else We have to Follow
SPRO > SAP REF IMG > FINANCIAL ACCOUNTING > ACCOUNTS RECEIVABLE AND ACCOUNTS PAYABLE > SUPPLIER ACCOUNTS > PREPARATIONS FOR CREATING SUPPLIER MASTER DATA > CLICK ON ASSIGN NUMBER RANGES TO VENDOR ACCOUNT GROUPS
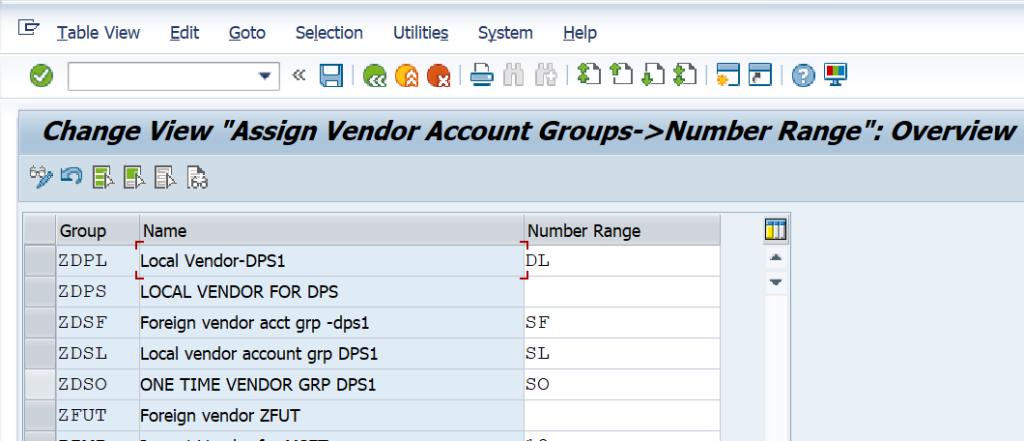
Click on Position enter your vendor account group

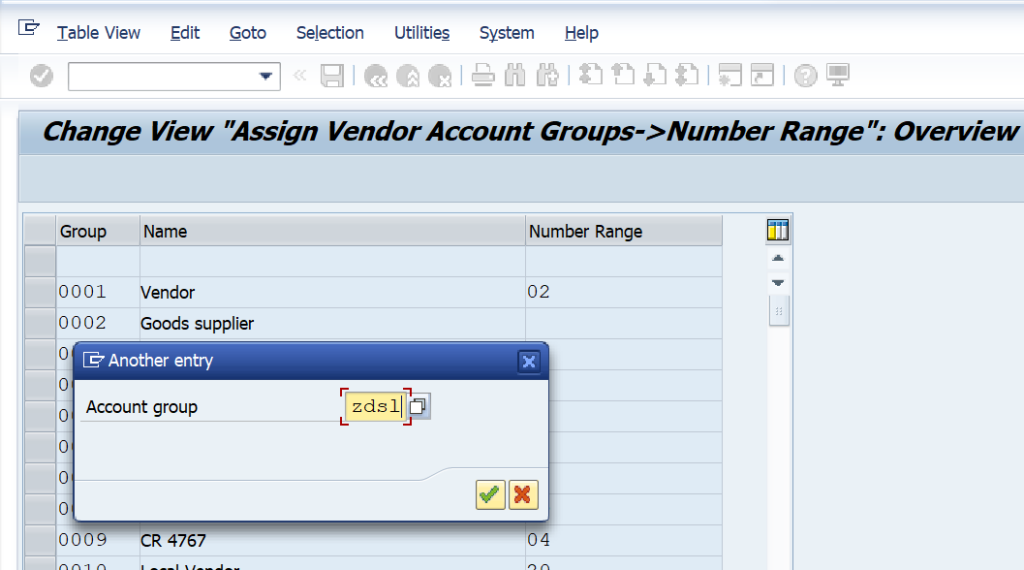
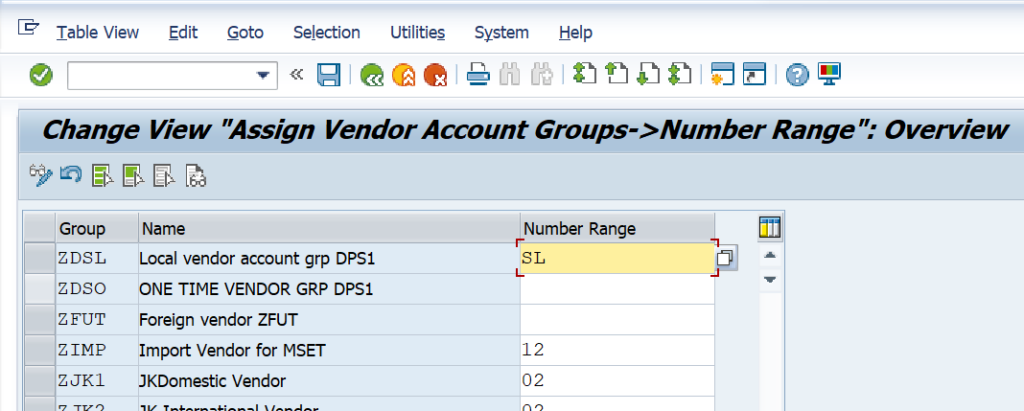
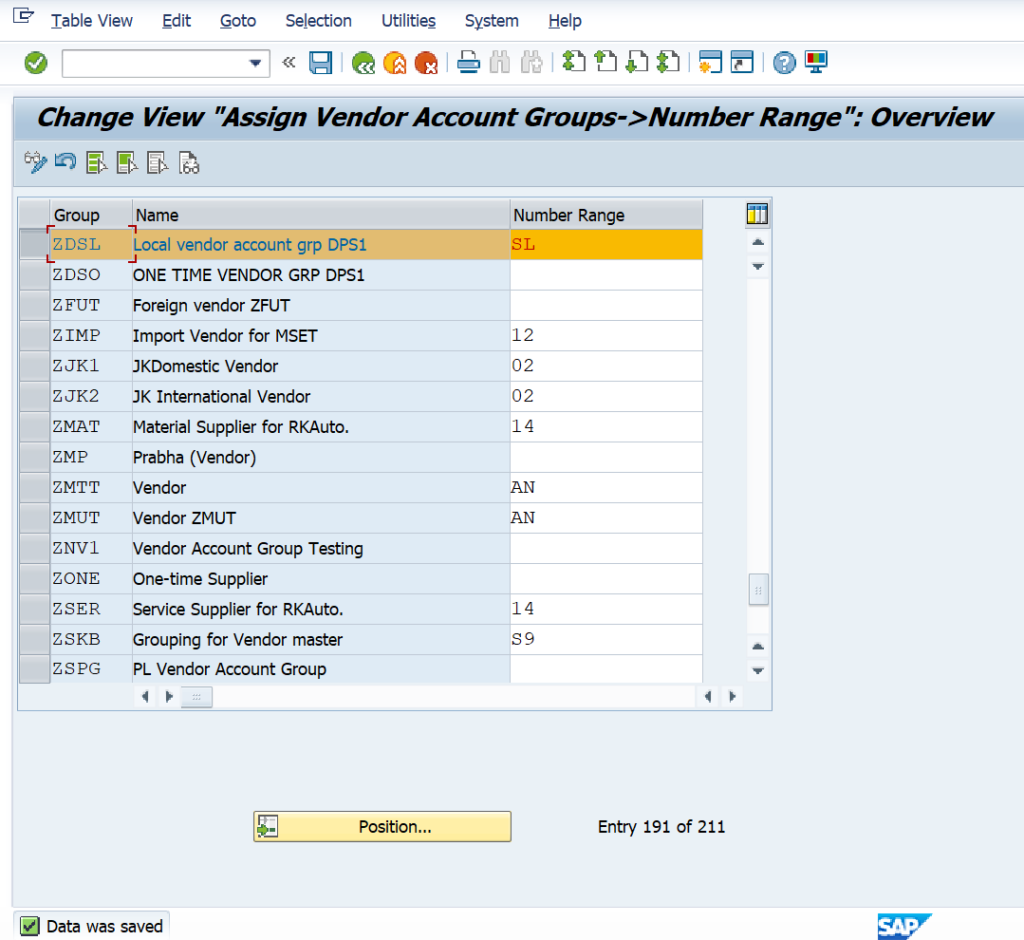
So, for local vendor account group defined number range is SL-500000-509999. Assign
number range no SL to ZDSL and save.
Save Transport Request

Here, completed assignment between number range and local vendor account group.
Same way For Foreign vendor account group and one-time account group and save
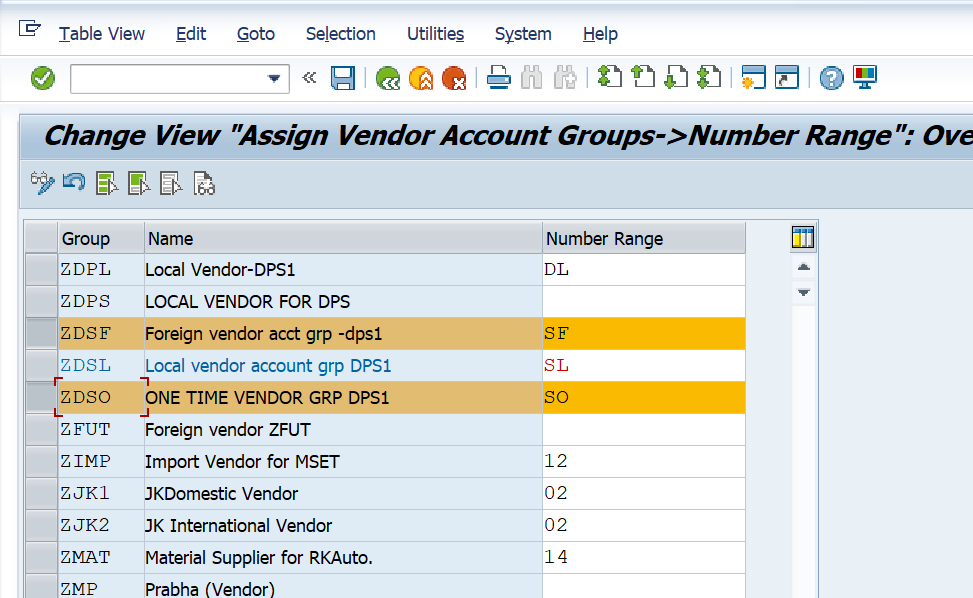
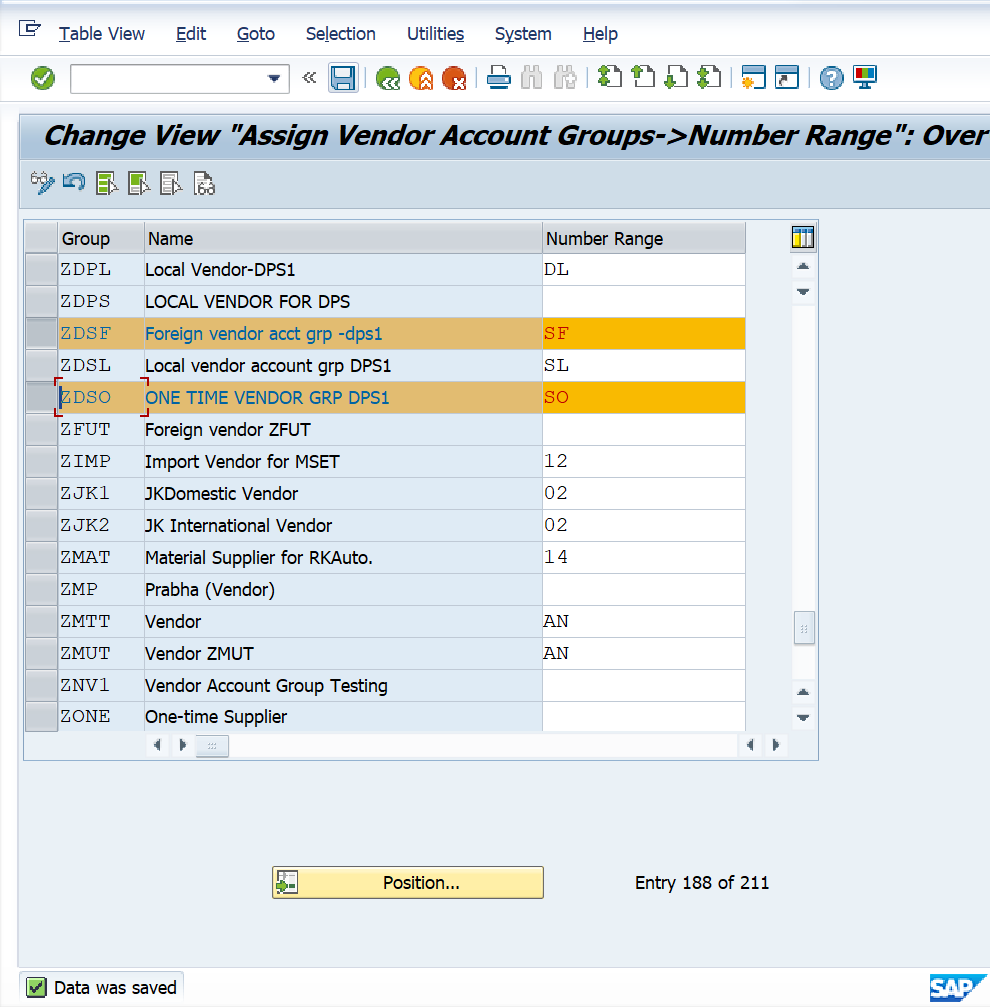
Here we check all assignment of number range to vendor account group completed
Business Partner Master Data Configuration
Define Number Range for Business Partner
We have to use TCode BUCF to Define Number Range in Business Partner or else we have to use Menu Path –
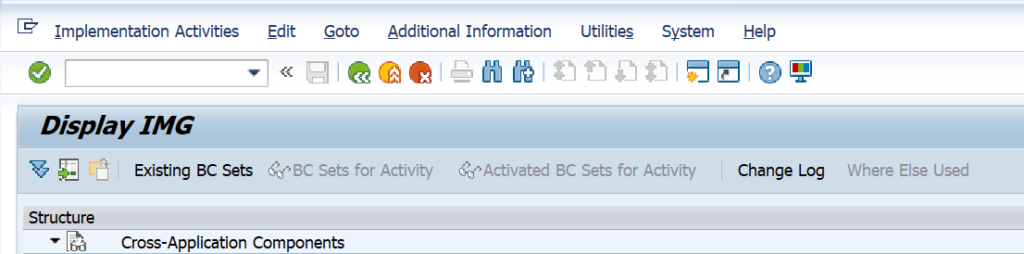
SPRO > SAP REF IMG > CROSS APPLICATION COMPONENT > SAP BUSINESS PARTNER > BUSINESS PARTNER > BASIC SETTING > NUMBER RANGES >CLICK ON DEFINE NUMBER RANGE

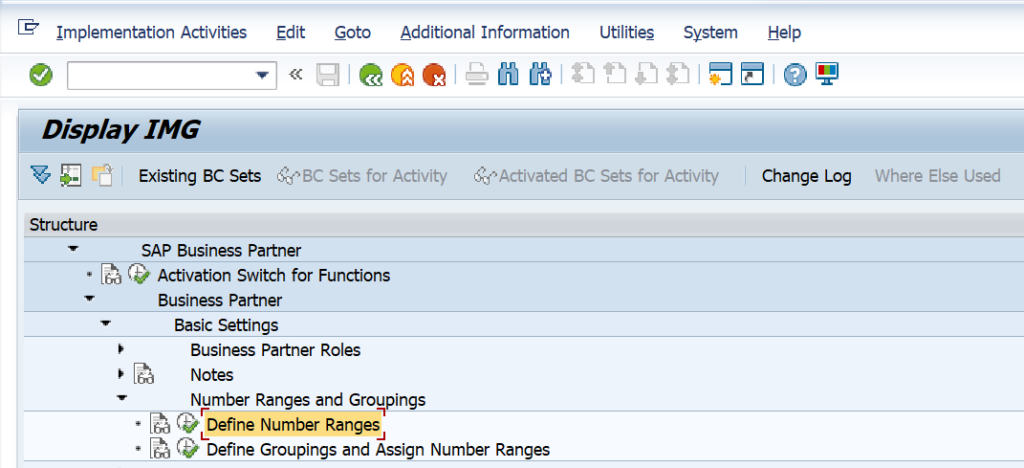
After clicking on number range, click on intervals to maintain number range
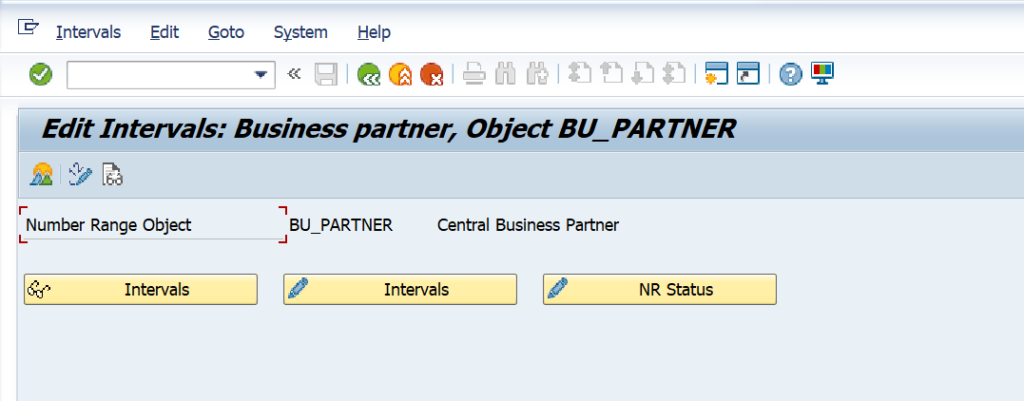
Click on insert icon and enter number range number and number range
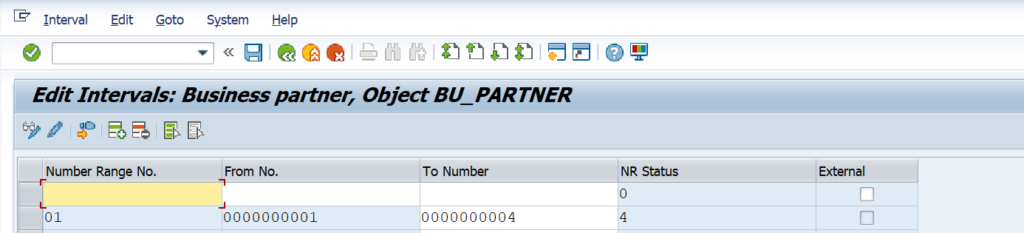
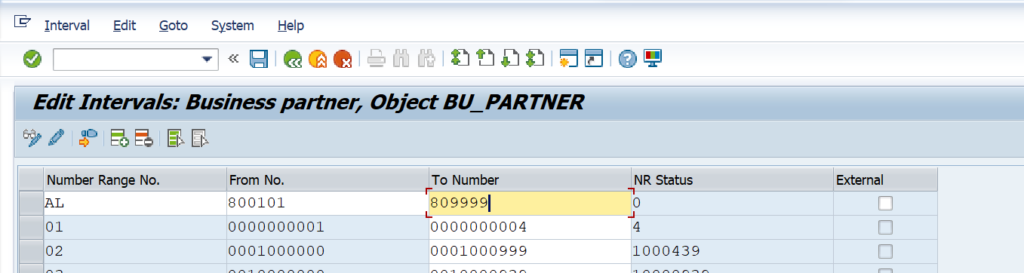
And click on save. Number range data saved

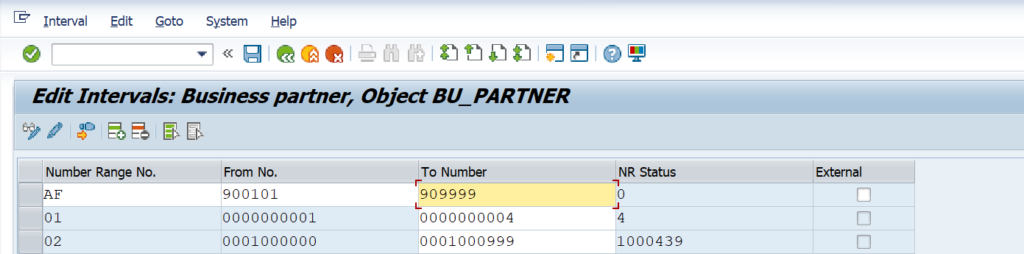
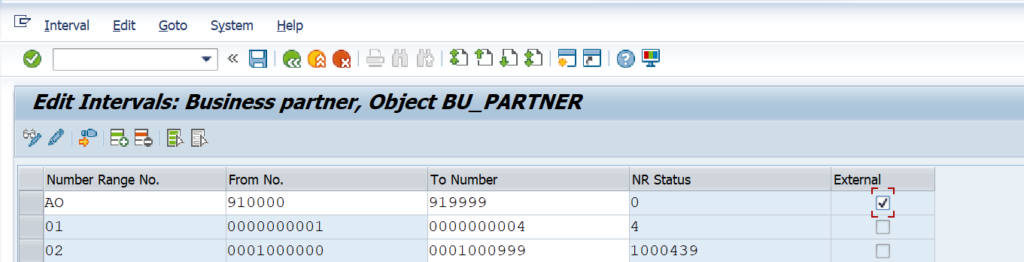
- For same procedure for foreign BP account Group and one-time bp account group to create Number range
- Number range for Foreign business account group.
- Click on insert icon and enter number range number and number range and save
Click on ok and data saved
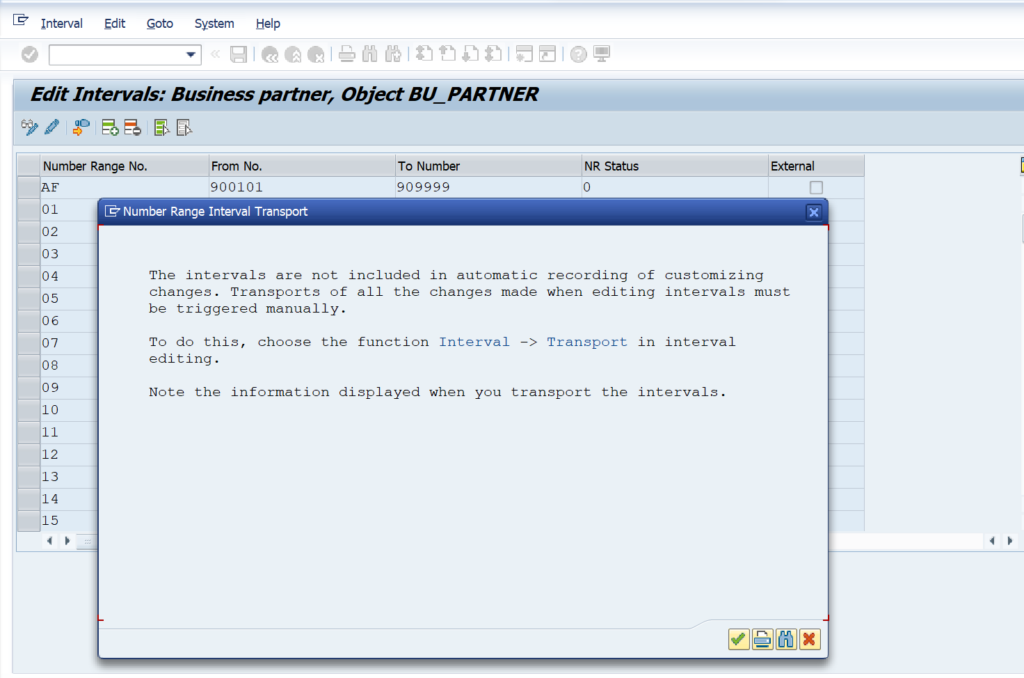
After Saving Data, system shows message

After click on save button all data related to number range saved
Now Define grouping and assign number range to business partner grouping.
We have to Follow the Path – SPRO > SAP REF IMG > CROSS-APPLICATION COMPONENTS > SAP BUSINESS PARTNER > BUSINESS PARTNER > BASIC SETTING >
NUMBER RANGE AND GROUPINGS > DEFINE GROUPINGS AND ASSIGN NUMBER RANGES
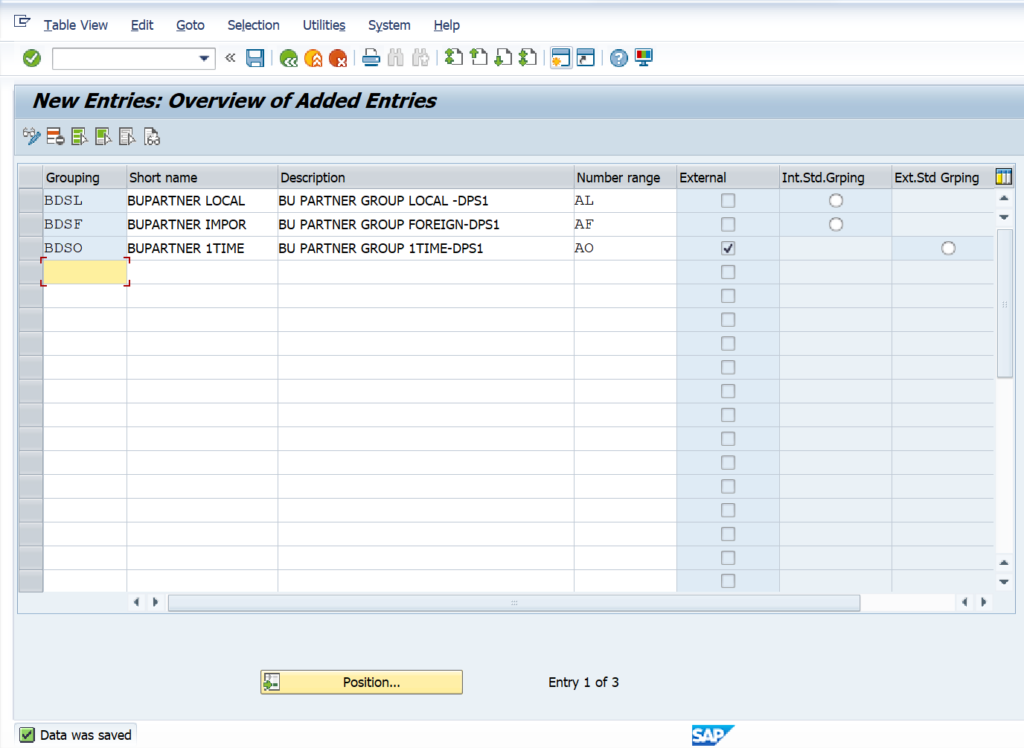
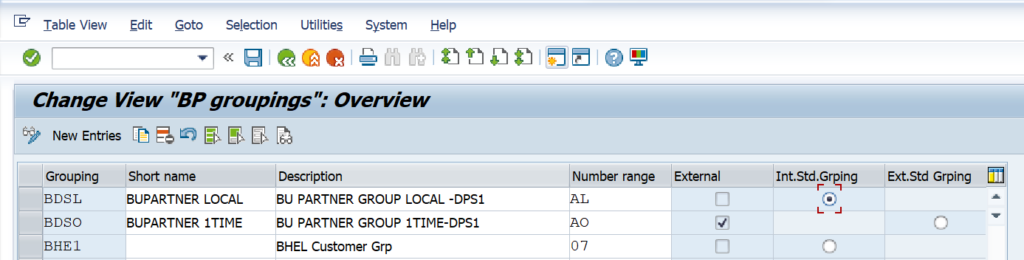
After clicking on define grouping and assign number ranges, click on new entries and
enter business partner grouping for local, foreign and one-time business partner grouping and assign defined number ranges for grouping and click on save.

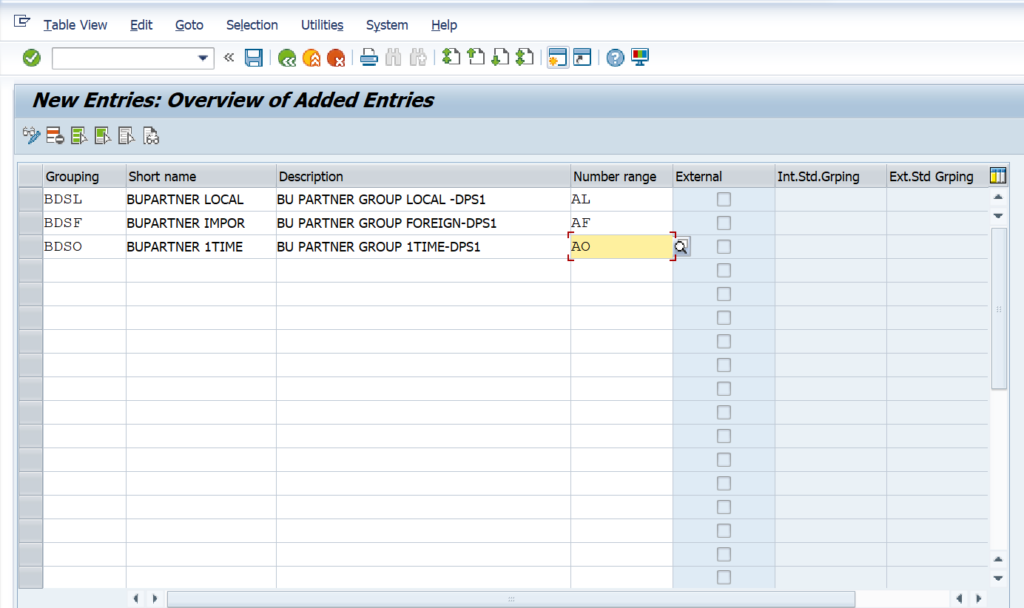
Save Transport request

After saving defining of BP grouping and assignment of business account grouping and
number range data saved
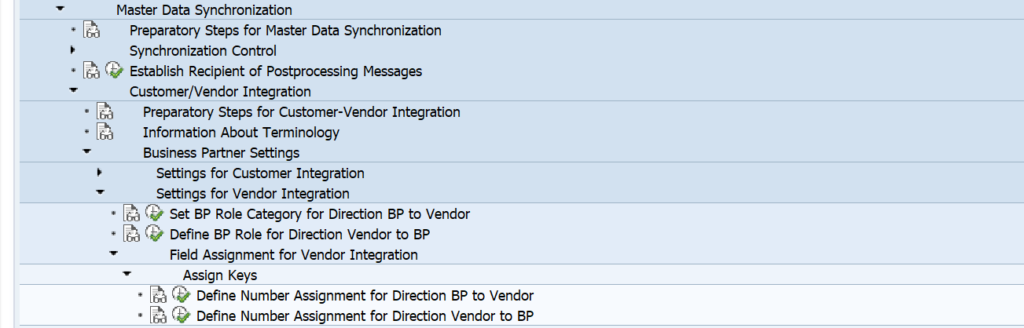
Now define Number Assignment Direction BP to Vendor
Then We have to follow menu Path as below –
SPRO > SAP REF IMG > CROSS APPLICATION COMPONENETS > MASTER DATA SYNCHRONIZATION > CUSTOMER/VENDOR INTEGRATION > BUSINESS PARTNER SETTING > SETTING FOR VENDOR INTEGRATION > FIELD ASSIGNMENT FOR VENDOR INTEGRATION > ASSIGN KEYS > DEFINE NUMBER ASSIGNMENT FOR DIRECTION BP TO VENDOR
Click on New Entries
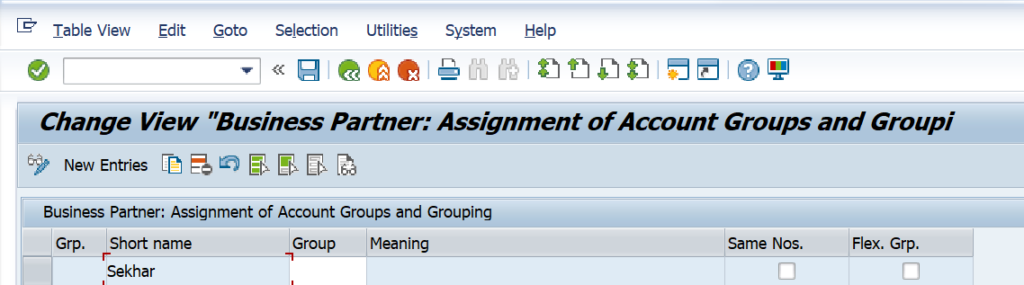
Enter Business account grouping and vendor account grouping and save
After saving, Data saved

Customer account group master Data
Define customer account group
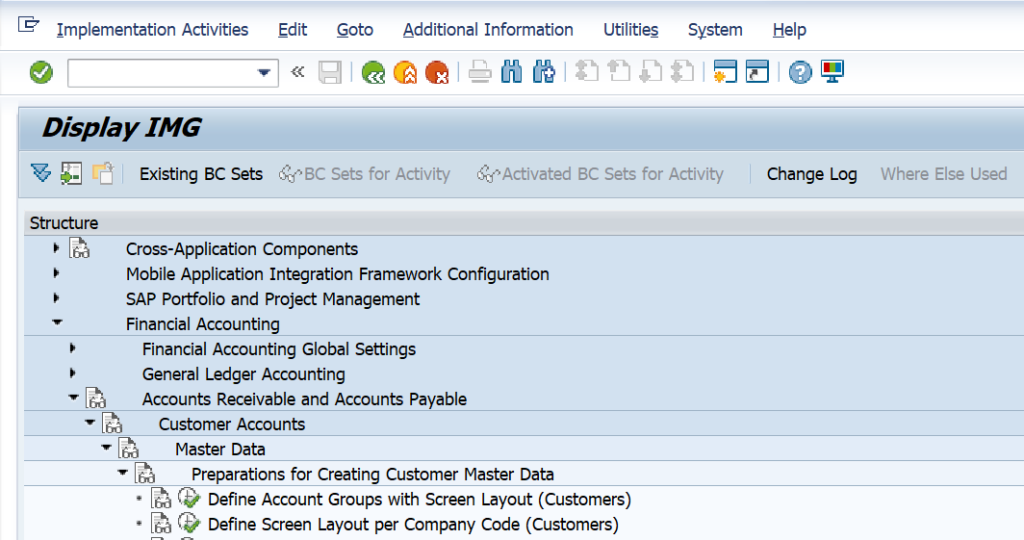
We have to Open Menu Path in SAP Logon
SPRO > SAP REF IMG > FINANCIAL ACCOUNTING > ACCOUNTS RECEIVABLE AND ACCOUNTS PAYABLE > CUSTOMER ACCOUNTS > MASTER DATA > PREPARATIONS
FOR CREATING CUSTOMER MASTER DATA > DEFINE ACCOUNT GROUP WITH SCREEN LAYOUT (CUSTOMERS)

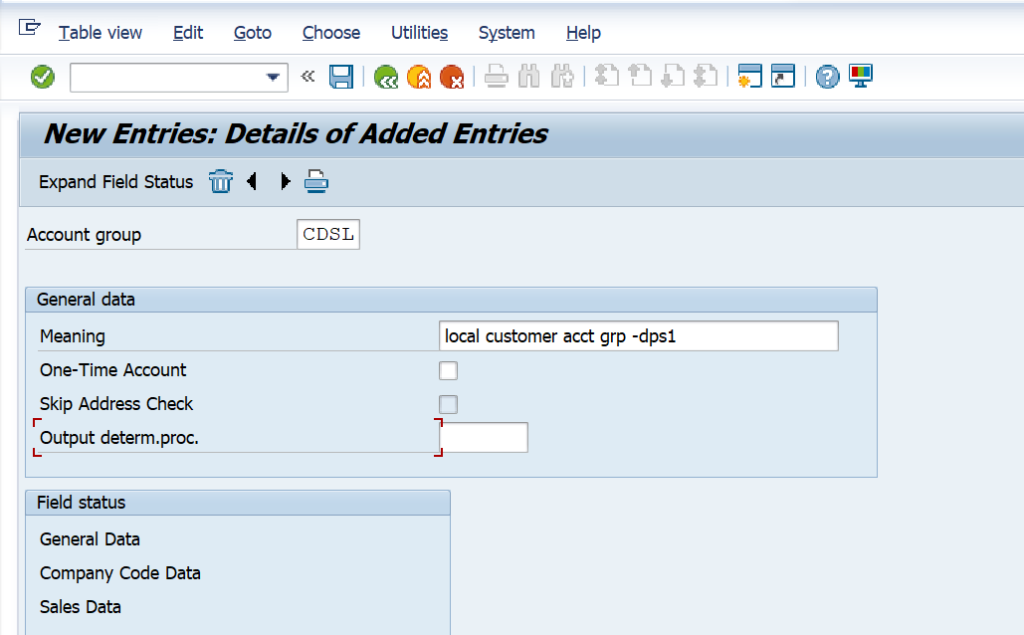
Click on New entries
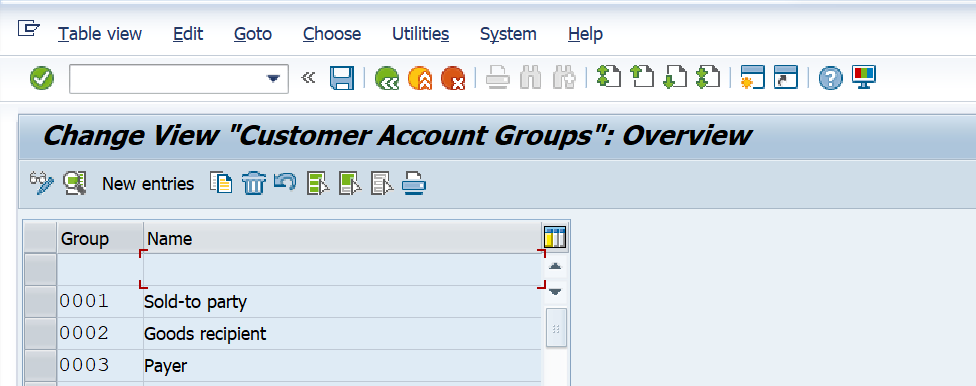
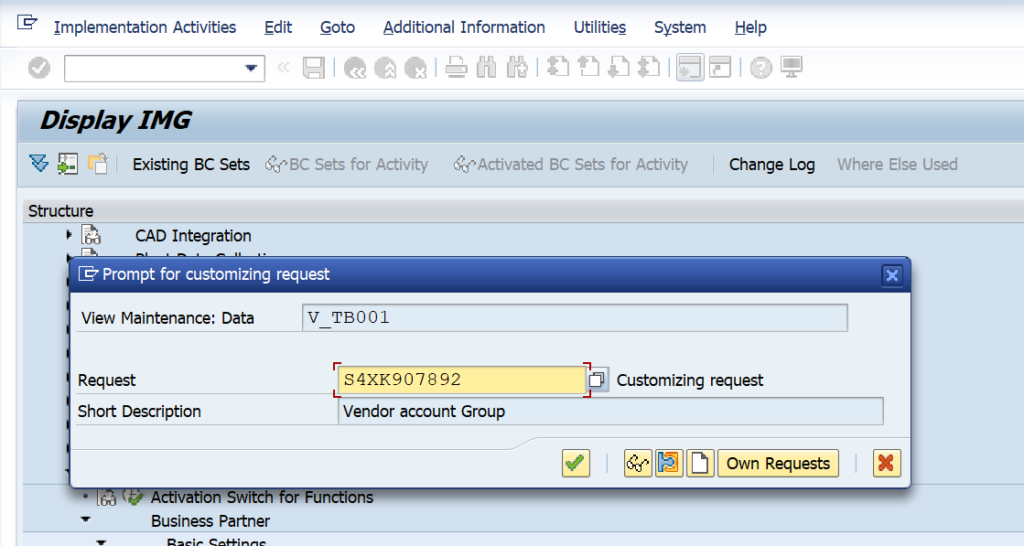
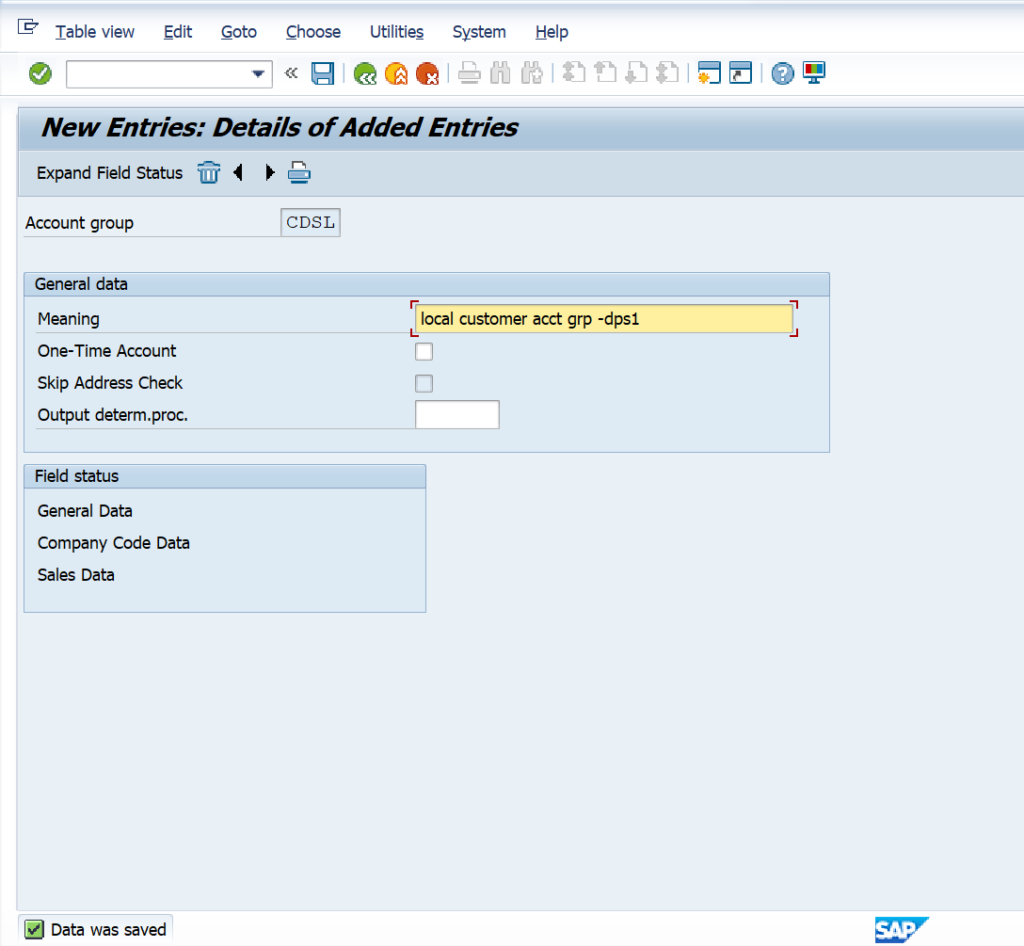
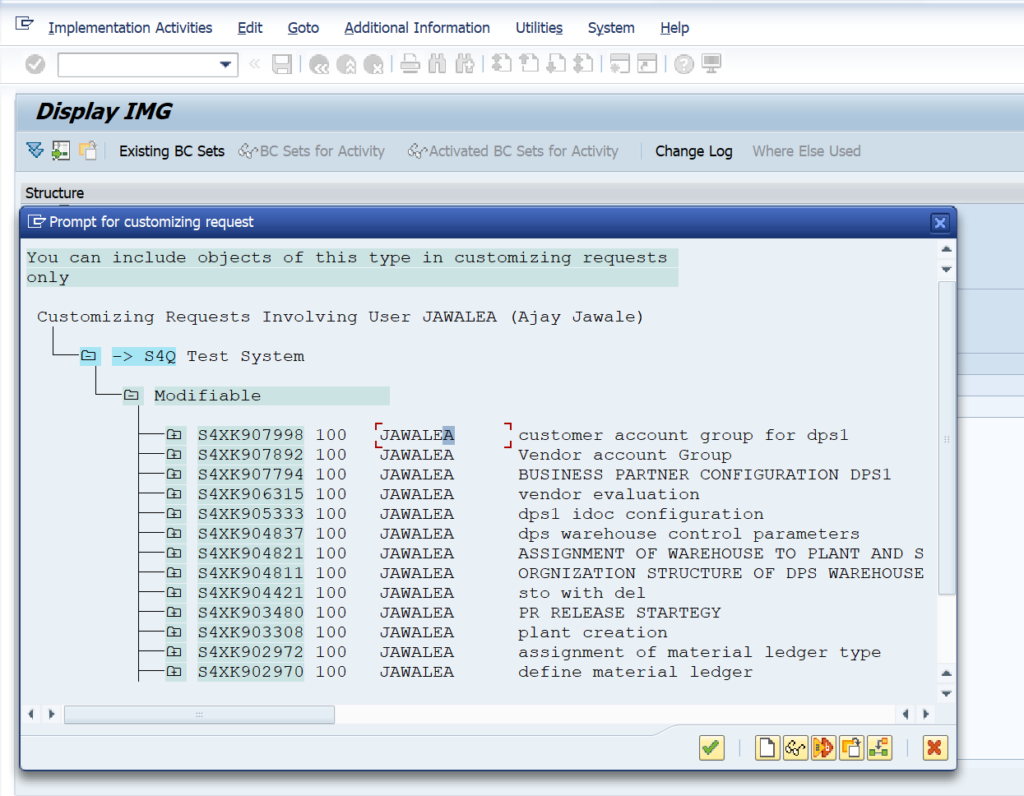
After clicking enter customer account group for local customer and click on save.
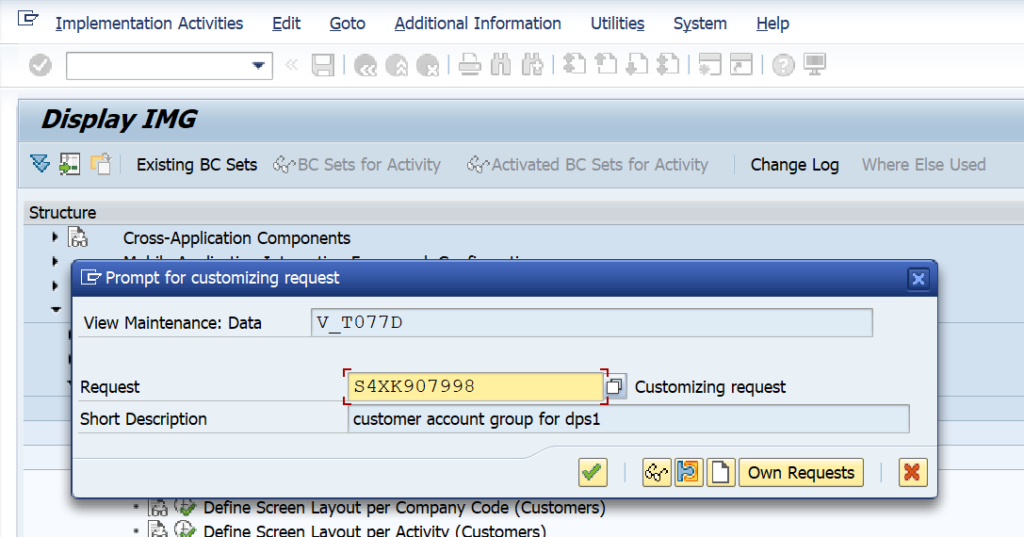
After saving, transport request generated, click on ok and save transport request and data saved

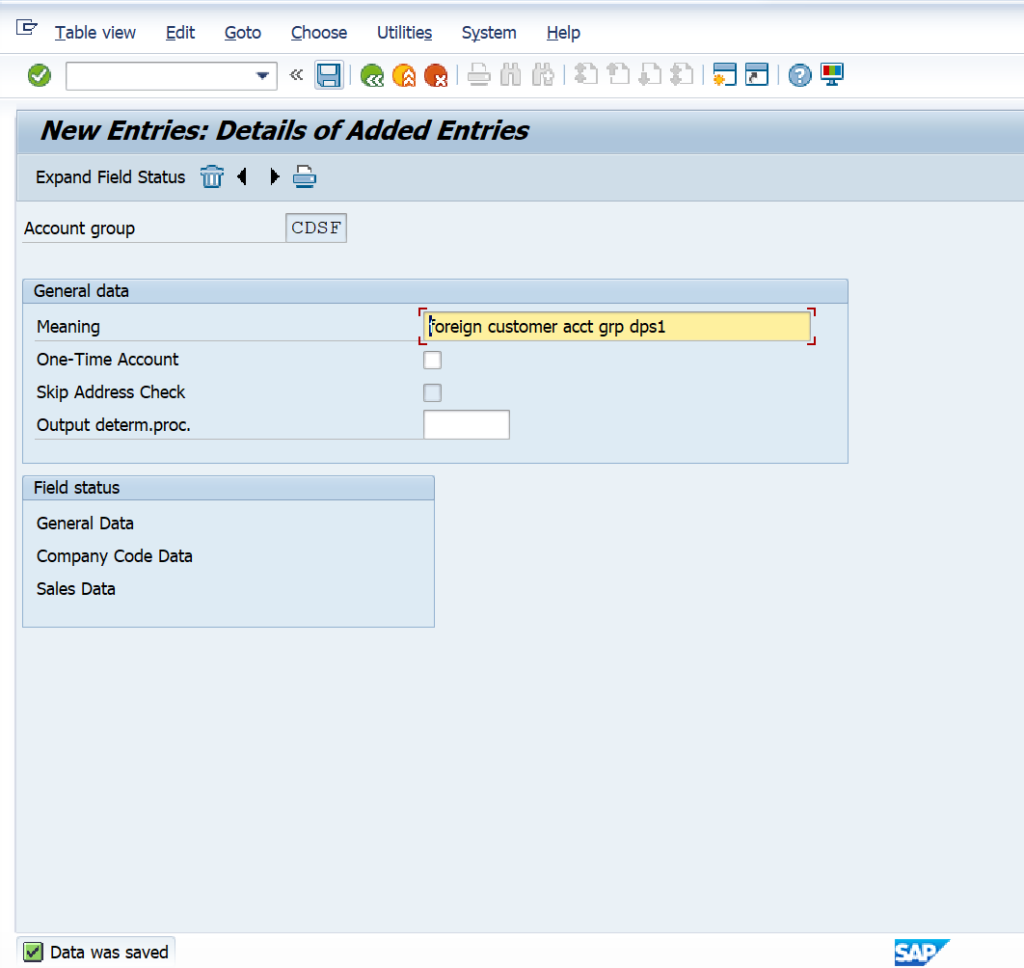
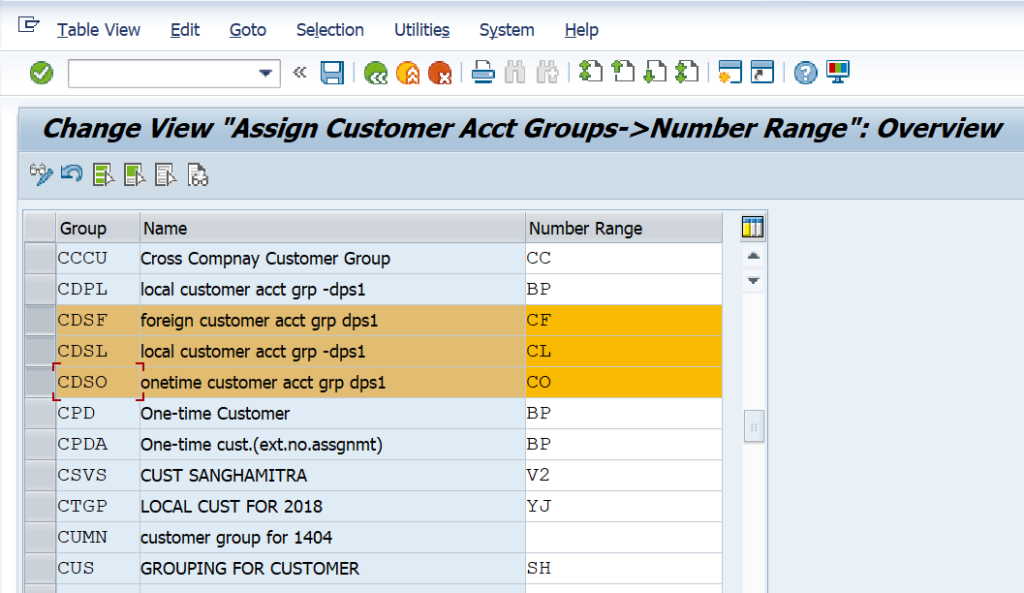
Same way define customer account group for foreign customer

Click on new entries

Enter account group and meaning for foreign customer account group and click on save

After saving, Data saved
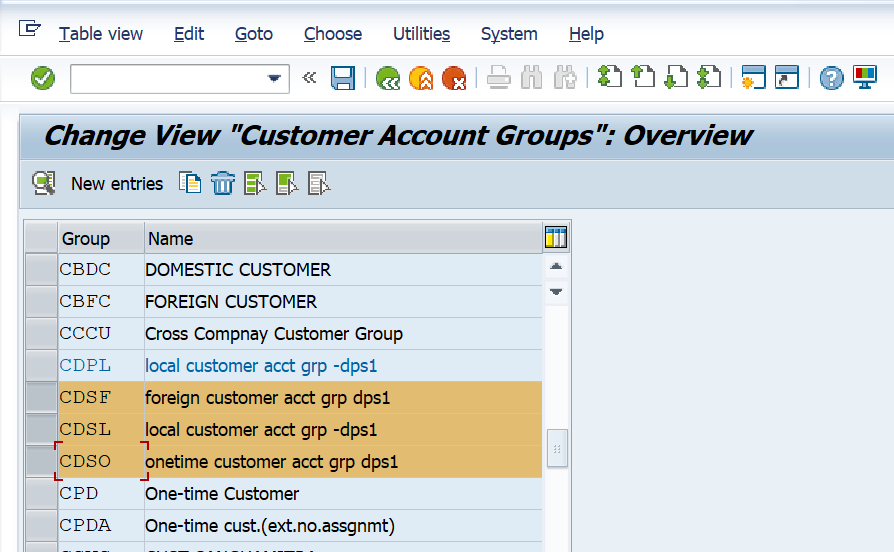
Now define customer account group for one-time customer.
Click on new entries

Enter one-time customer and meaning and mark check box of one-time customer and
save data.

After saving, data saved.

See, here all customer account groups saved.
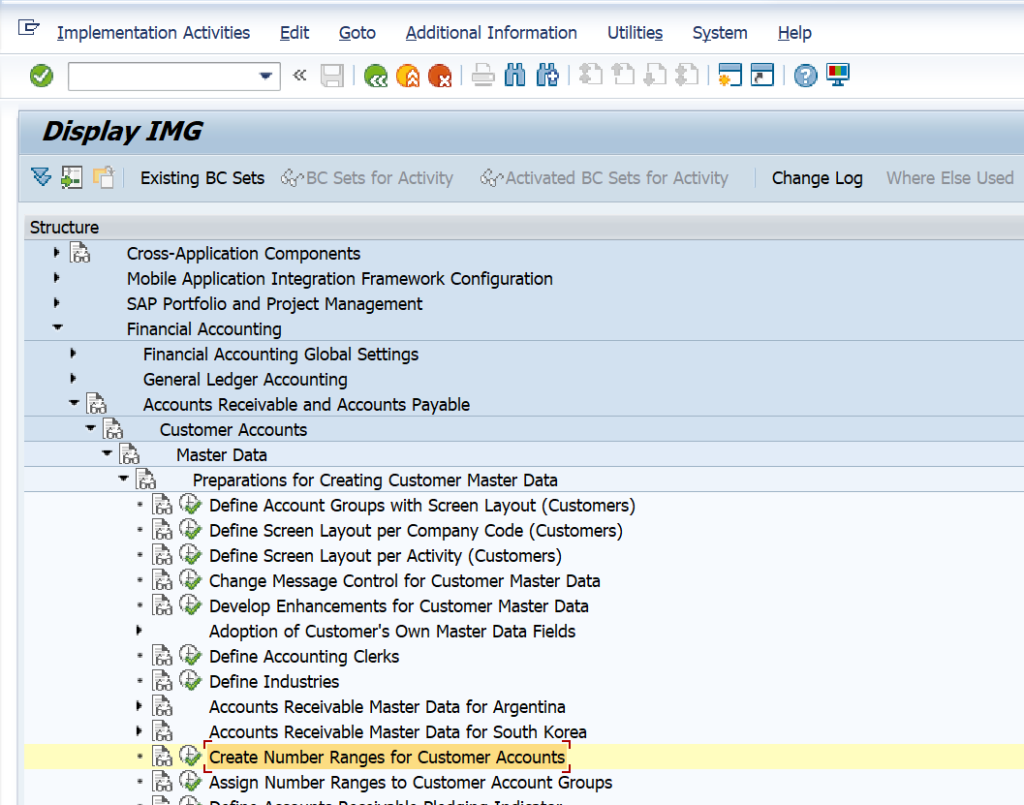
define number range customer account group
We have to Open the following path with in SAP Logon Pad – SPRO > SAP REF IMG > FINANCIAL ACCOUNTING > ACCOUNTS
RECEIVABLE AND ACCOUNTS PAYABLE > CUSTOMER ACCOUNTS >
MASTER DATA > PREPARATIONS FOR CREATING CUSTOMER MASTER
DATA > CREATE NUMBER RANGES FOR CUSTOMER ACCOUNTS
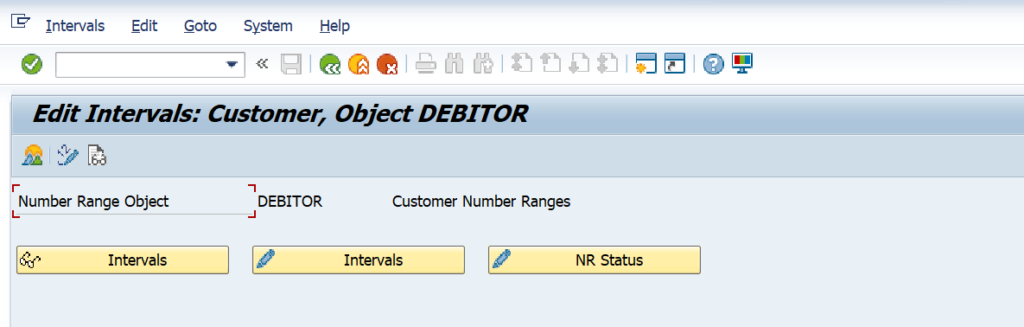
Click on Intervals
Now click on inert icon for maintain number range.
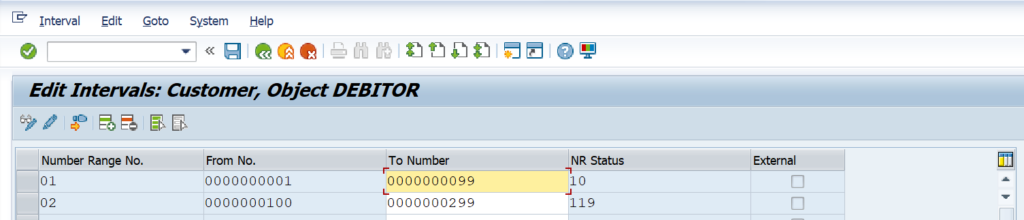
Now maintain Number range No. and Number range and click on save.
Click on save
And number range saved

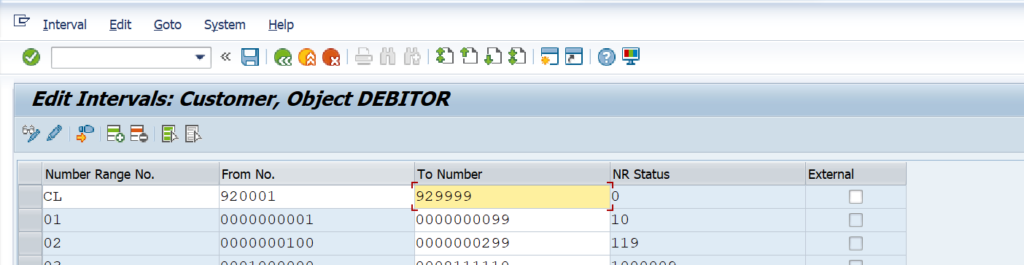
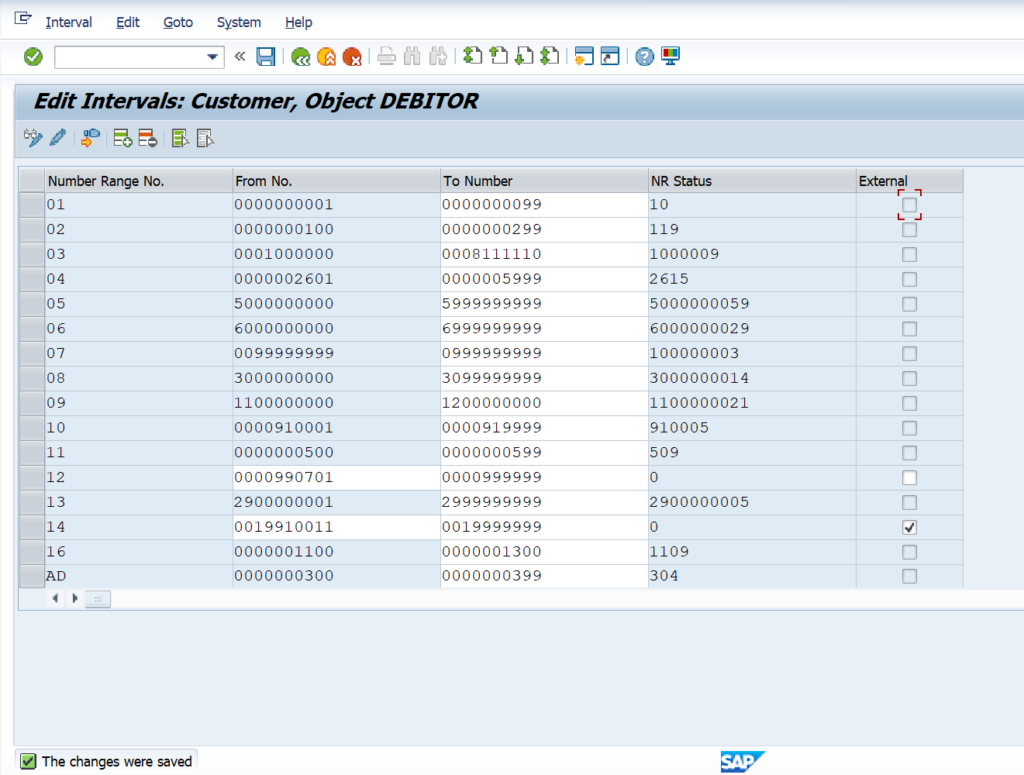
Same way define number range for foreign customer account group and one-time
customer account group and save and system show message data was saved.

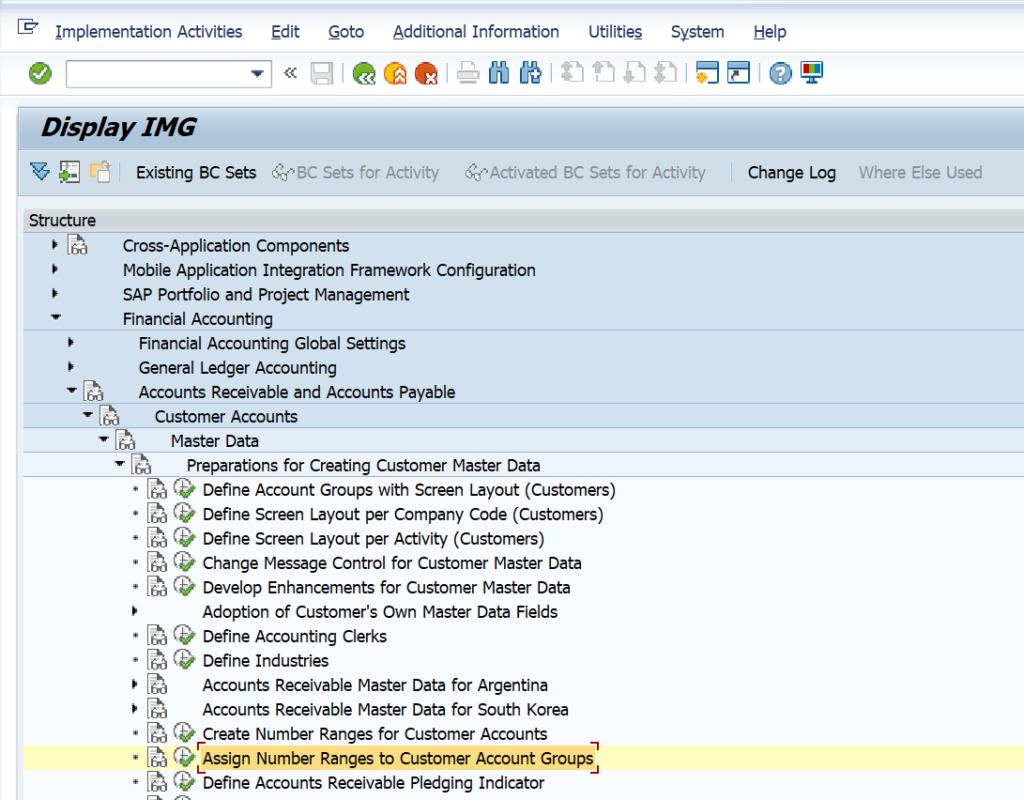
Assign Number ranges to customer account grouping
SPRO > SAP REF IMG > FINANCIAL ACCOUNTING > ACCOUNTS RECEIVABLE AND ACCOUNTS PAYABLE > CUSTOMER ACCOUNTS > PREPARATIONS FOR CREATING CUSTOMER MASTER DATA > CLICK ON ASSIGN NUMBER RANGES TO CUSTOMER ACCOUNT GROUPS
Click on position and enter customer account group
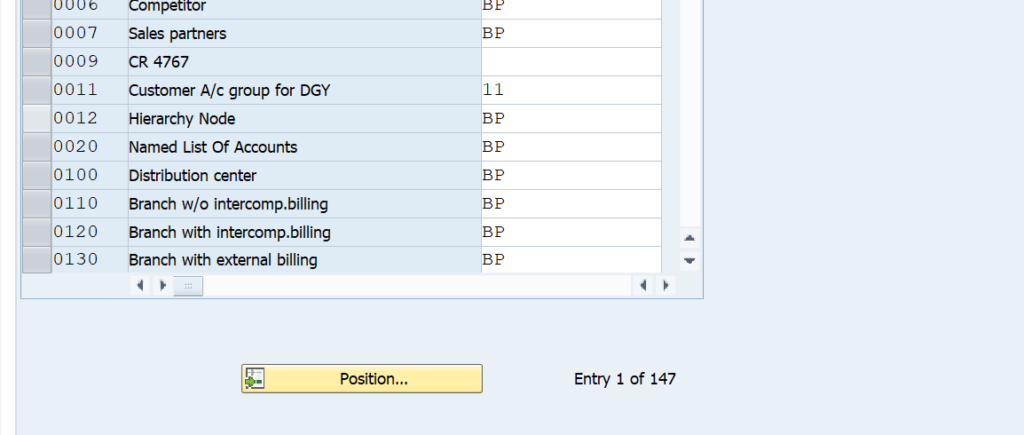
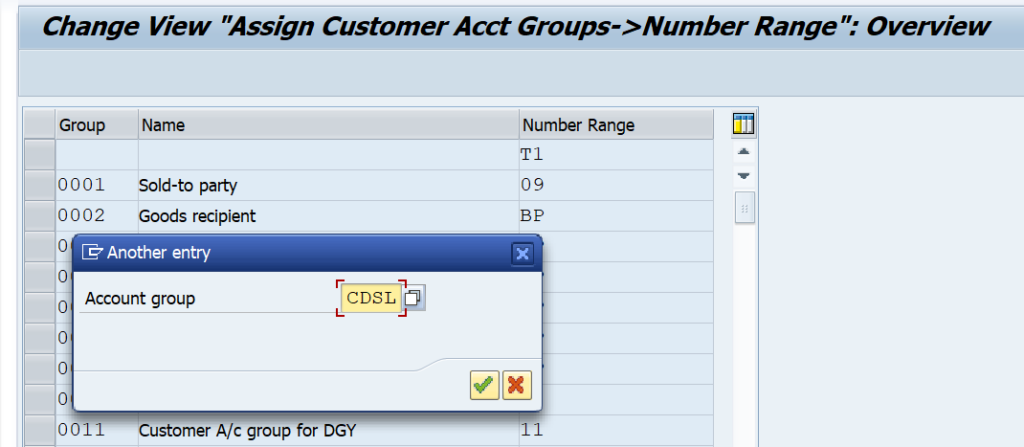
Enter all account groups and assign number range for groups and click on save.
Transport request generated and click on save and assignment of number ranges to
grouping saved.
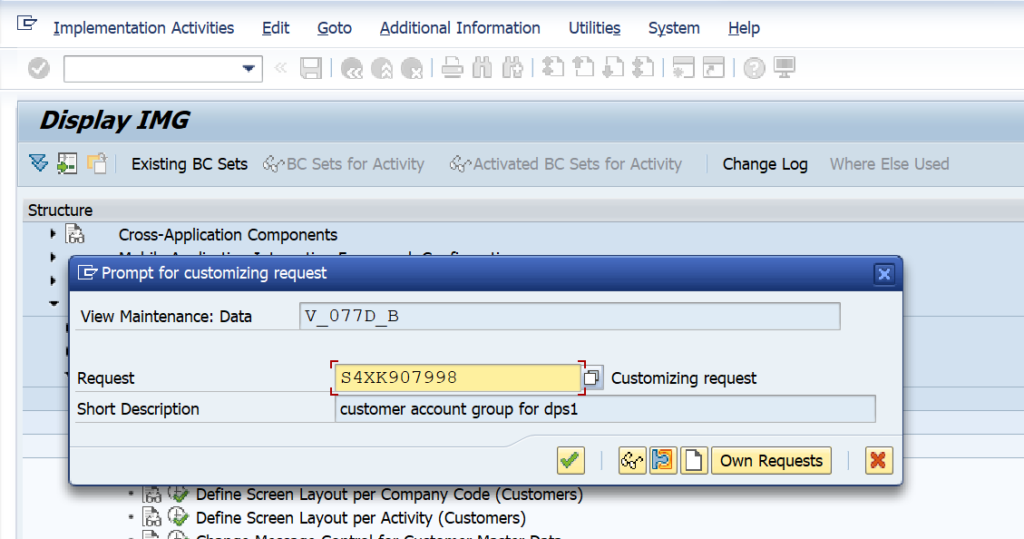
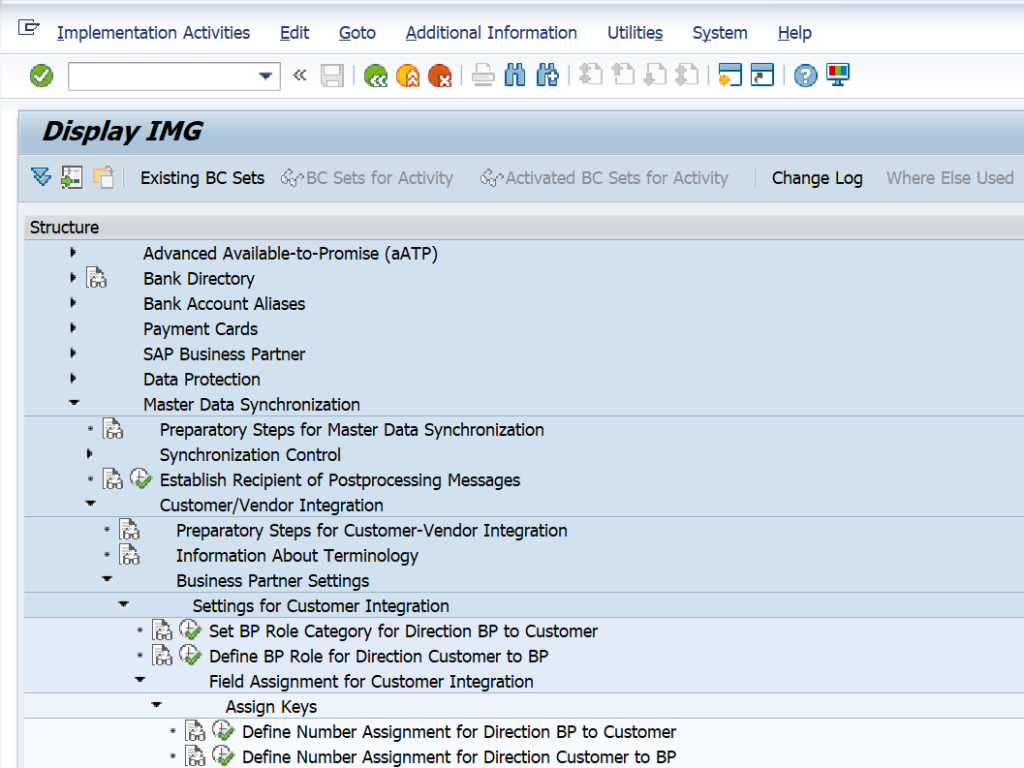
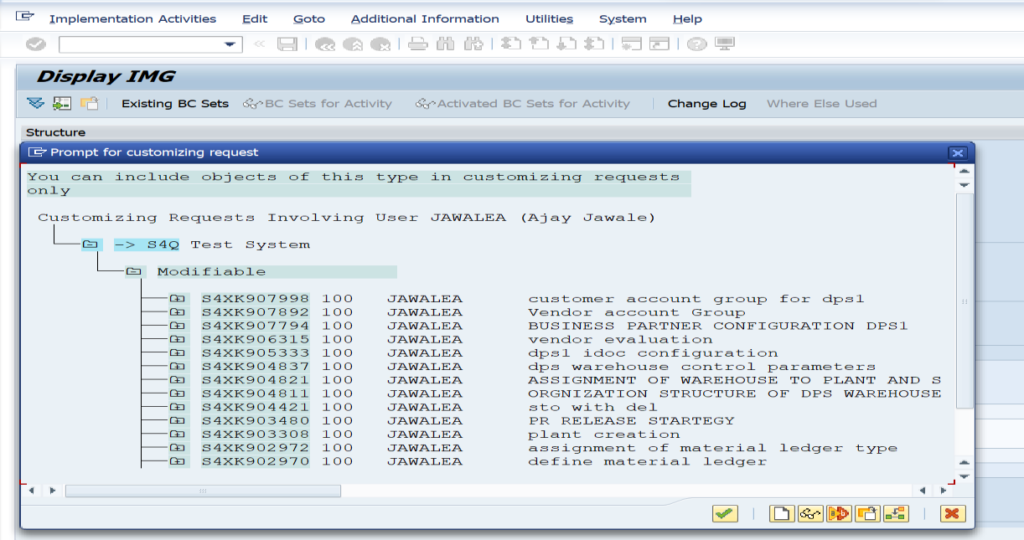
Now Define Number Assignment for Direction BP to Customer.
SPRO > SAP REF IMG > CROSS APPLICATION COMPONENETS > MASTER DATA SYNCHRONIZATION > CUSTOMER/VENDOR INTEGRATION > BUSINESS PARTNER SETTING > SETTING FOR CUSTOMER INTEGRATION > FIELD ASSIGNMENT FOR CUSTOMER INTEGRATION > ASSIGN KEYS > DEFINE NUMBER ASSIGNMENT FOR DIRECTION BP TO CUSTOMER

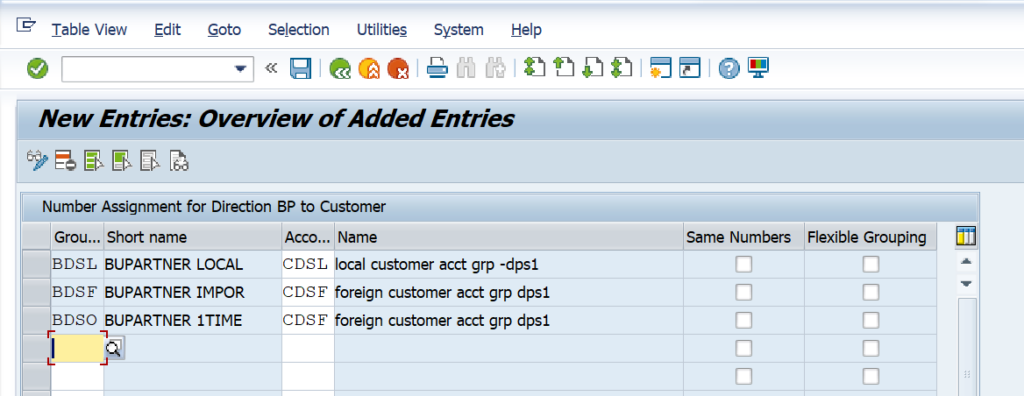
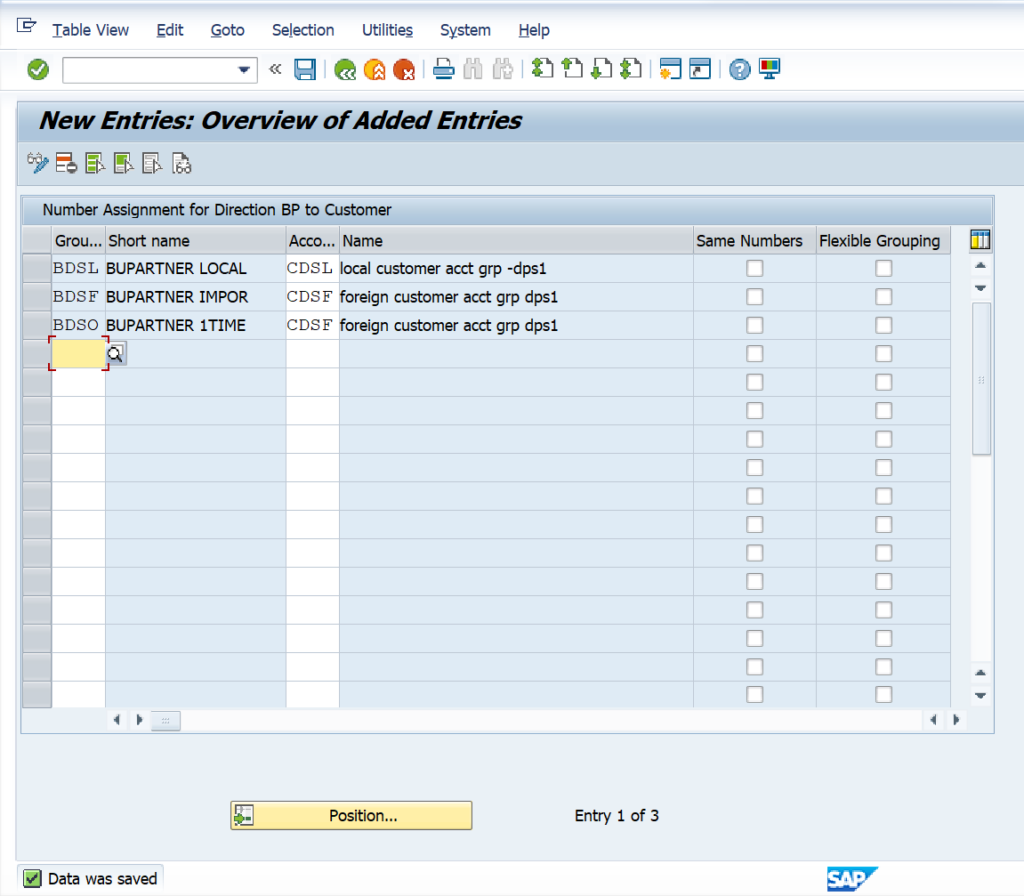
Now Click new entries.
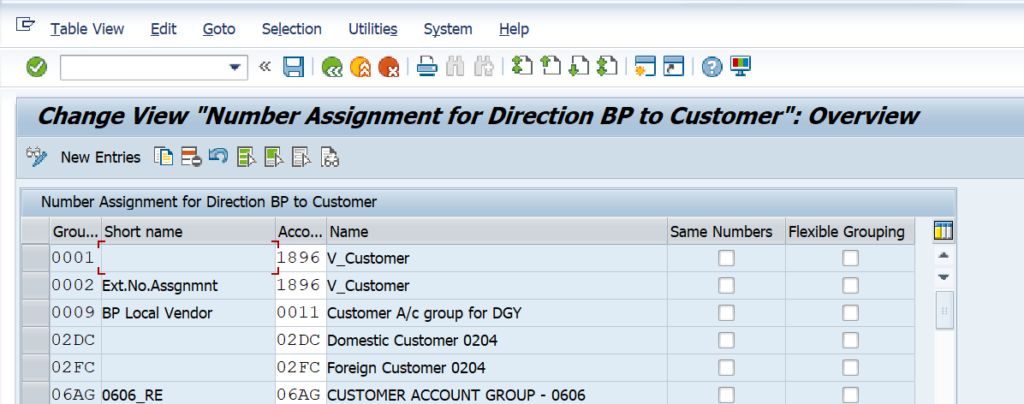
Enter Business Partner account grouping and customer account grouping and save all
data.
Now transport request generated click and save transport request
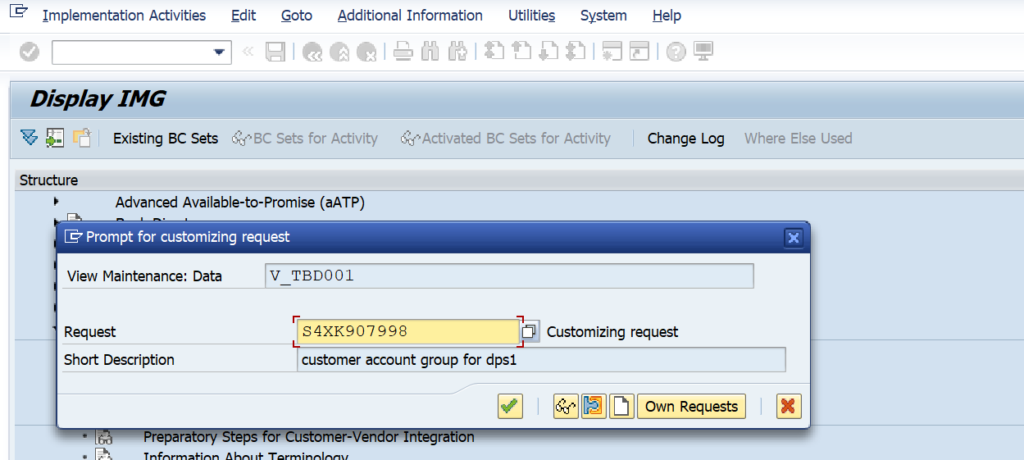
Define Number Assignment for Direction BP to Customer.
Vendor Partner Determination
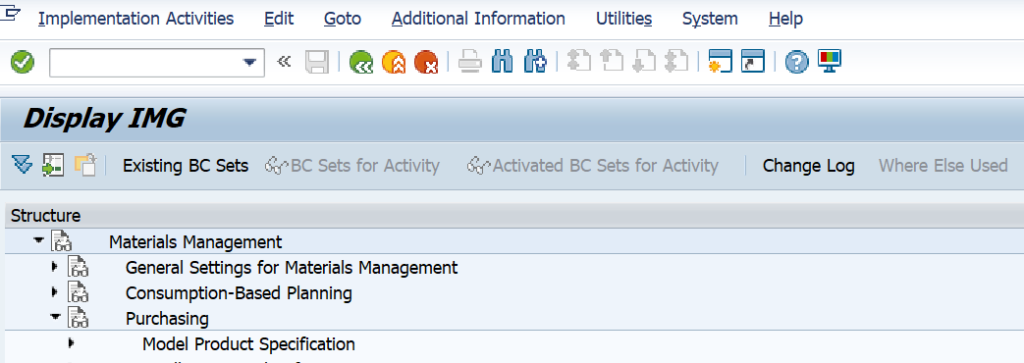
SPRO > SAP REF IMG > MATERIAL MANAGEMENT > PURCHASING > PARTNER DETERMINATION > PARTNER ROLES > CLICK ON DEFINE PARTNER ROLES
You can use standard partner roles or you can define as per your business need. Here we
use standard partner roles
VN-Vendor
DP-Delivering Plant
PI-Invoicing Party
FS-Freight supplier


Define permissible partner roles per account group
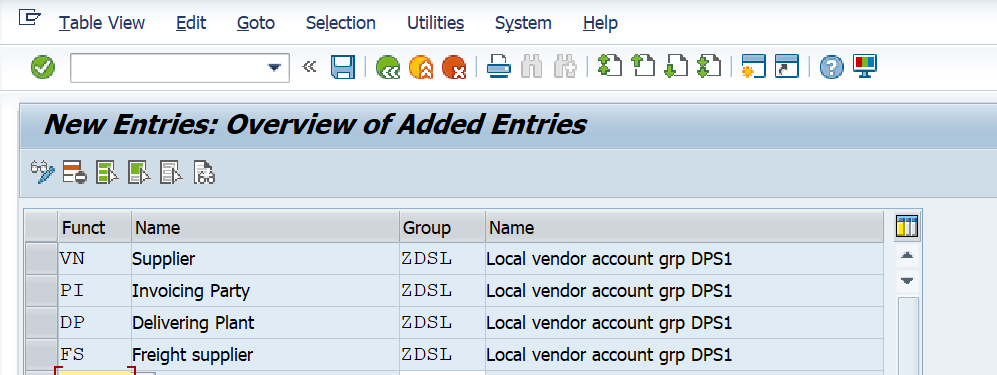
SPRO > SAP REF IMG > MATERIAL MANAGEMENT > PURCHASING > PARTNER DETERMINATION > PARTNER ROLES > DEFINE PERMISSIBLE PARTNER ROLES PER ACCOUNT GROUP


Click on New Entries
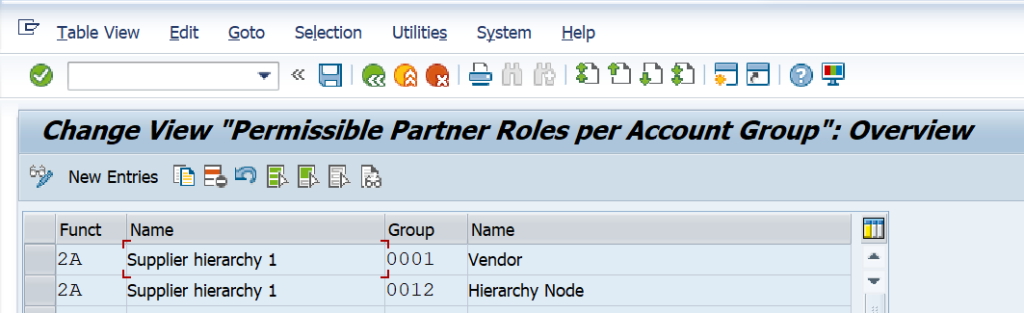
Enter partner roles and vendor account group and save the data
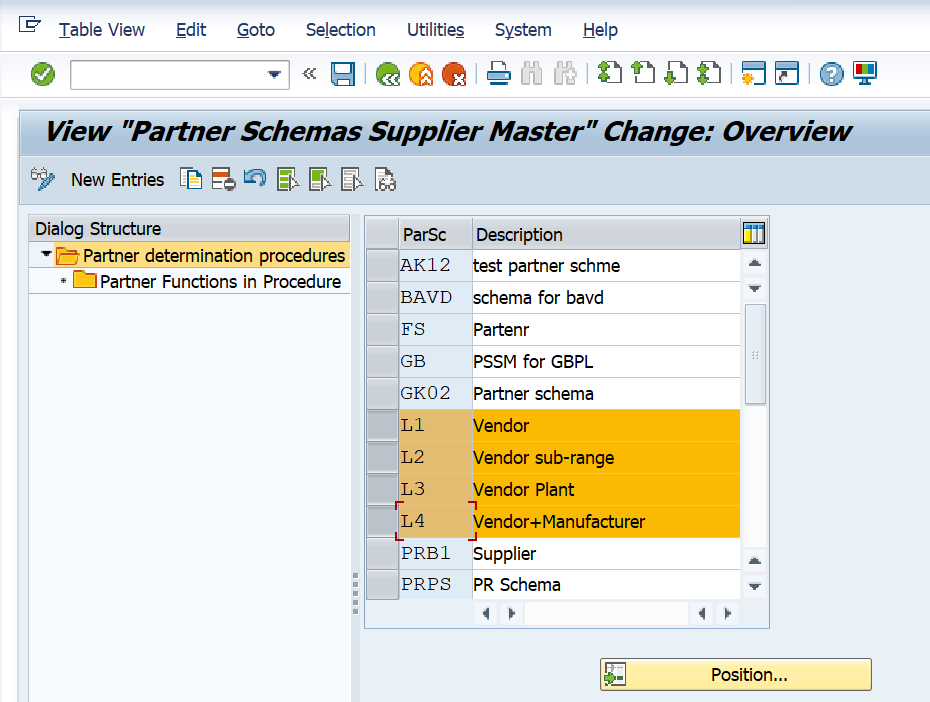
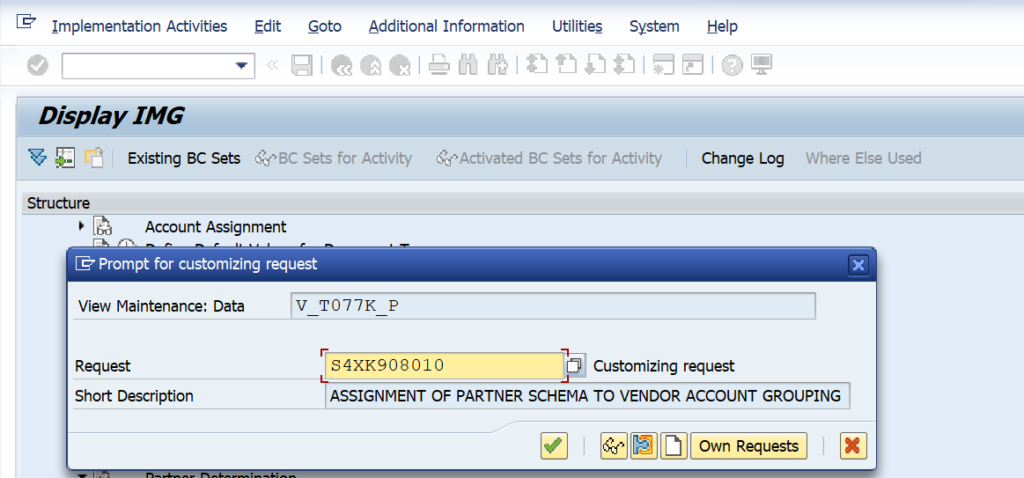
Define Partner Schema in supplier Master record
SPRO > SAP REF IMG > MATERIAL MANAGEMENT > PURCHASING > PARTNER DETERMINATIONS > PARTNER SETTING IN SUPPLIER MASTER RECORD > DEFINE PARTNER SCHEMAS IN SUPPLIER MASTER RECORD


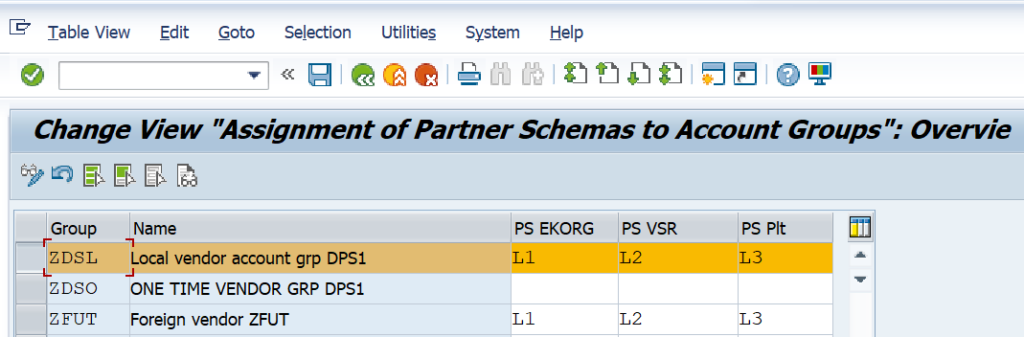
Now assign Partner schemas to account groups
Go to SAP Logon Pad then follow below Menu Path -> SPRO > SAP REF IMG > MATERIAL MANAGEMENT > PURCHASING > PARTNER DETERMINATIONS > PARTNER SETTING IN SUPPLIER MASTER RECORD > ASSIGN PARTNER SCHEMAS TO ACCOUNT
GROUPS
Click on Position and enter vendor account group

Enter Vendor account group and assign partner schemas and click on save.
Transport request generated and save transport request.

Important Terms:
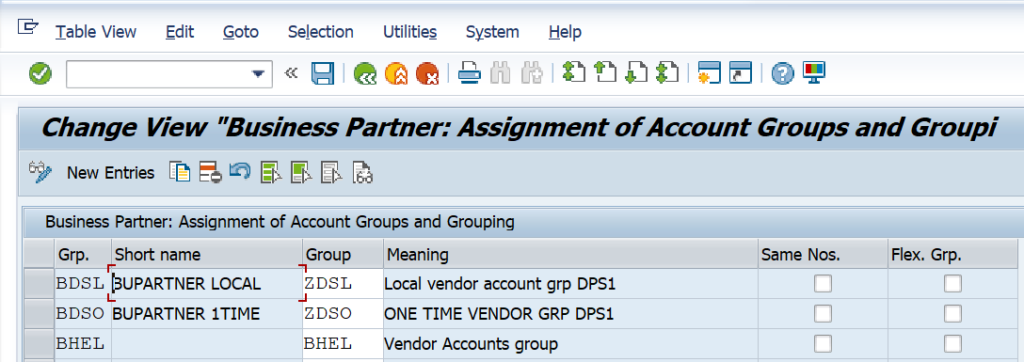
Flexible Grouping:
- If we mark this checkbox then you can change your vendor
account group. - If we not mark this checkbox then you can’t change your vendor
account group which is assigned to business partner account
grouping.
Now here we check, we not marked the checkbox of flexible grouping
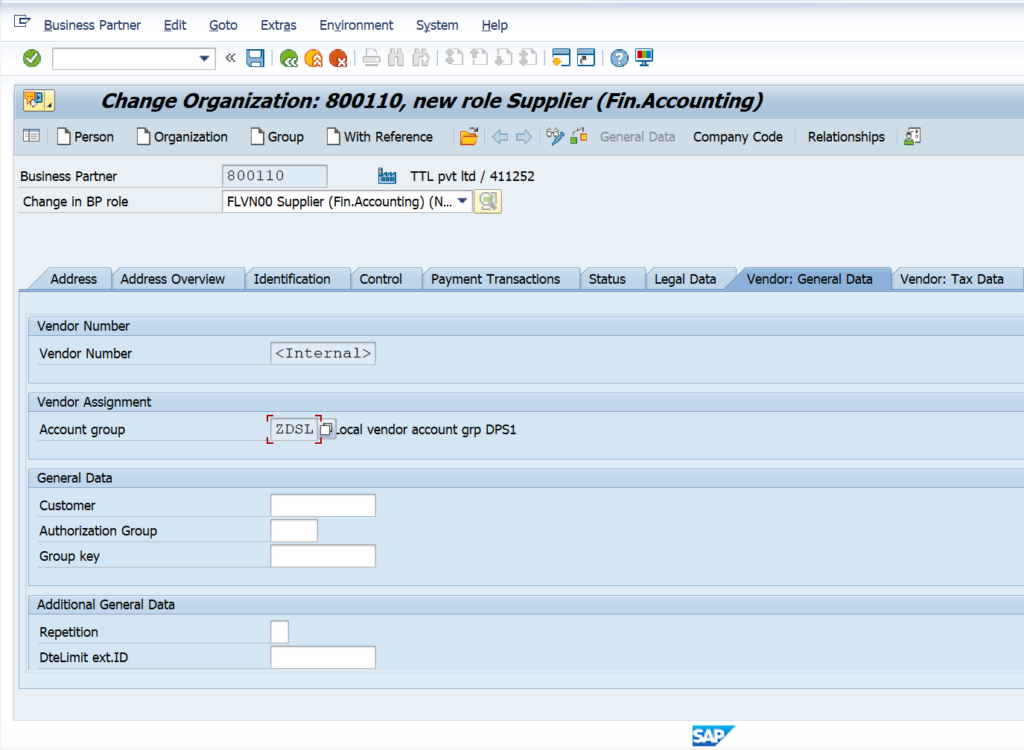
Now we check TCODE BP, in BP role FLVN00 -vendor general data we can check we can’t change vendor account group.
If we Marked flexible group checkbox, we able to change vendor account group. We check on system.
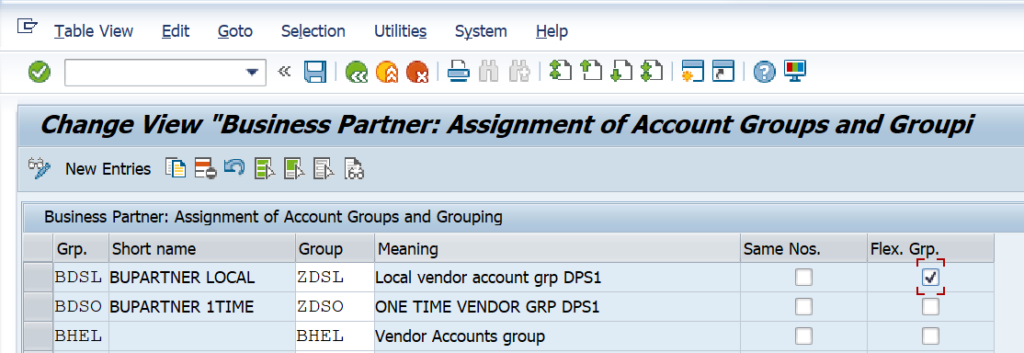
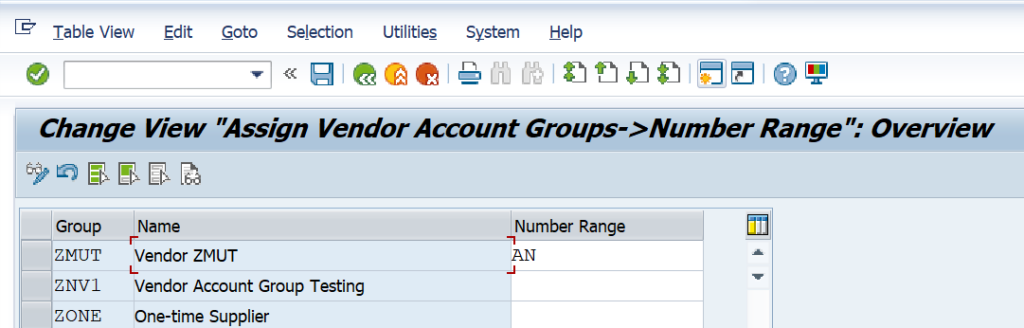
So, we can see here we can able change vendor account group we take ZMUT vendor account group.

Here, checked on system it allows to take flexible grouping and According to vendor account group (ZMUT), supplier number also triggered.

You can check in number range and vendor account grouping also.
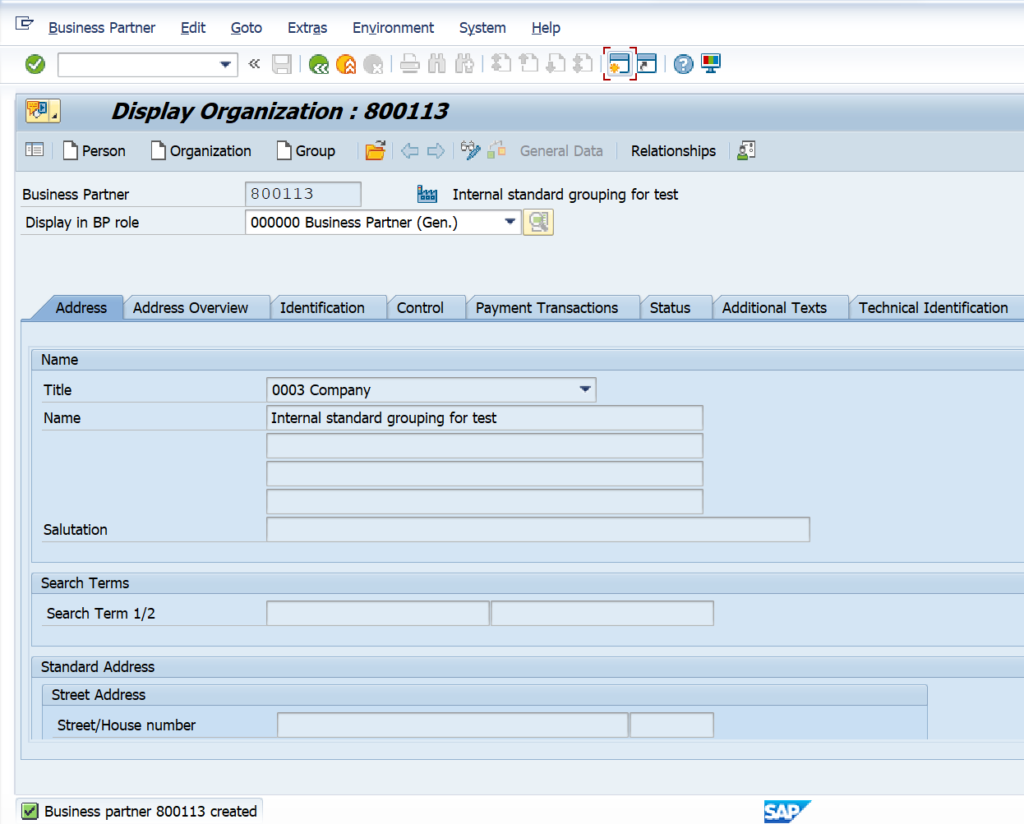
Internal Standard grouping
If we click on Internal standard grouping for Business Partner account group and vendor account group then we need not select the bp grouping while creating business partner.
Here we not selected any grouping. Enter all details and save. According to BP grouping and number range business partner generated.
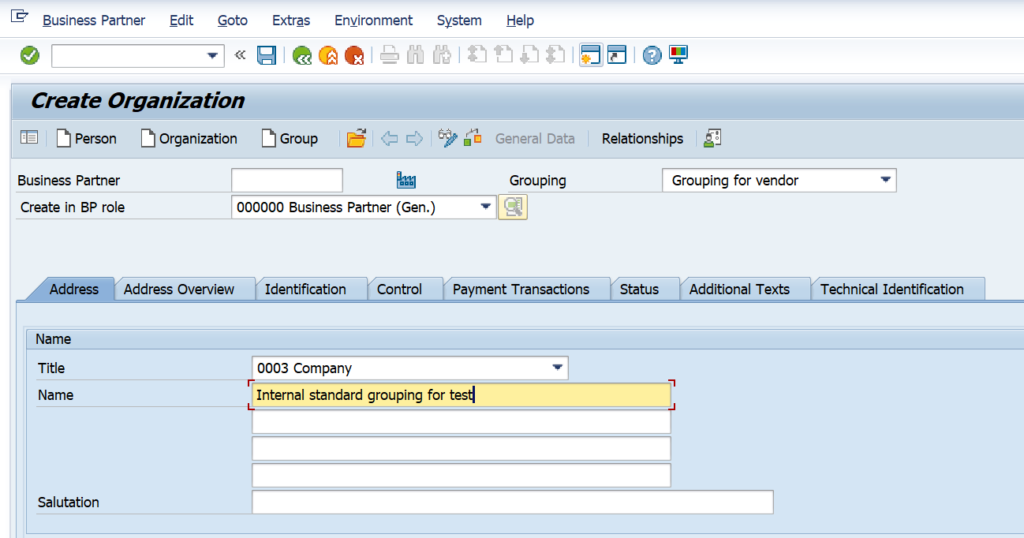
Here you can check business partner is created and number range assigned according to business partner account group.