Hello friends if you are looking for Business Place Configuration in SAP FICO notes | Business Place Configuration SAP PDF Notes | Business Place Configuration Step by Step Procedure | Business Place Configuration For Beginners then you will get Help here.
1) Define Business Place
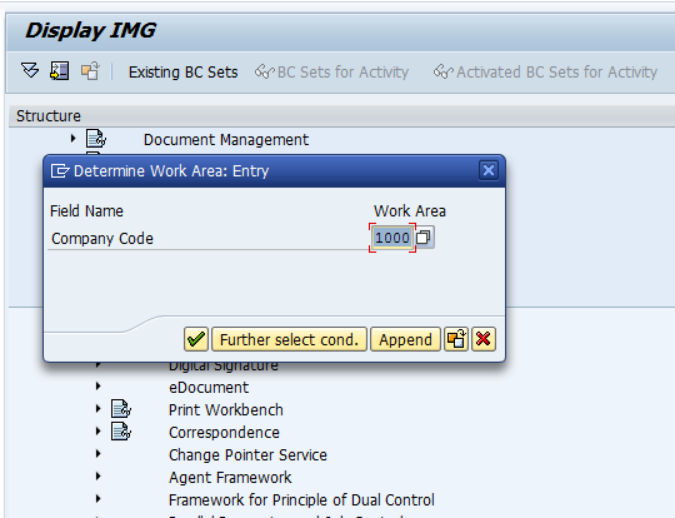
Path: SPRO – IMG – Cross Application Components – General Application Functions – Business Place – Define Business Place
Select Define Business Place
Company Code – 1000
New Entries
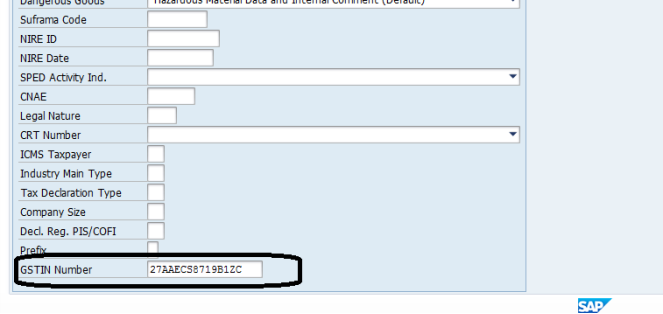
Enter the details as shown below

Now, Click on Address Button
Country: IN
Region: 27 (MH)
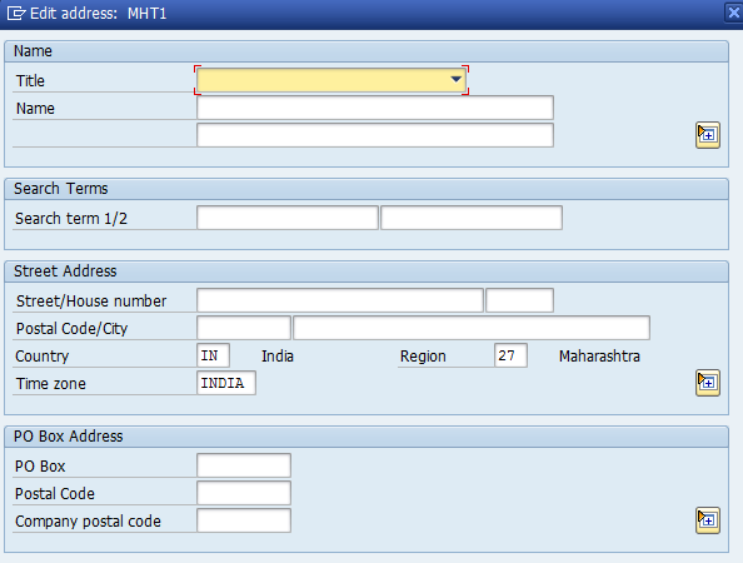
Click on SAVE.
Repeat the same Procedure for the remaining business places.
2) Assign Business Places to Plants
Same Path:
Click on Position
Plant – 1100
Click on Enter
Assign Business Place MHT1 to the plant 1100.

Click on SAVE
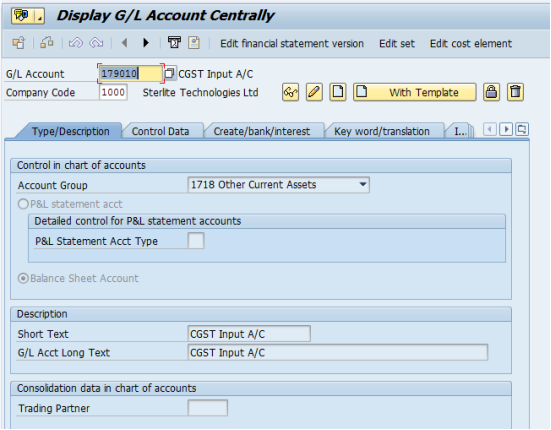
3) Creation of GL Accounts (FS00)
Transaction Code: FS00
Create the GST Tax GL’s as shown Below:
GL Account Code: 179010
Select Account Group: 1718 Other Current Assets
Short Text: CGST Input A/C
G/L Account Long Text: CGST Input A/C
Go to Control Data Tab:
Select Account Currency: INR
Select Tax Category: * (All tax types allowed)
Select Sort key: 001 (Posting Date)

Go to Create/ Bank/ Interest Tab
Select Field Status Group: G001 General (with Tax, assignment)
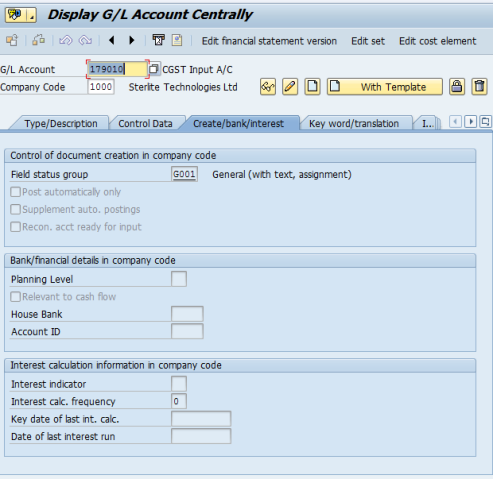
Click on SAVE.
4) Creation of Tax Code (FTXP)
Transaction Code: FTXP
Country – IN
Click on Enter
Tax Code – ZA Description: SGST/ CGST 5% input
Tax Type: V (Input Tax)
Click on Enter
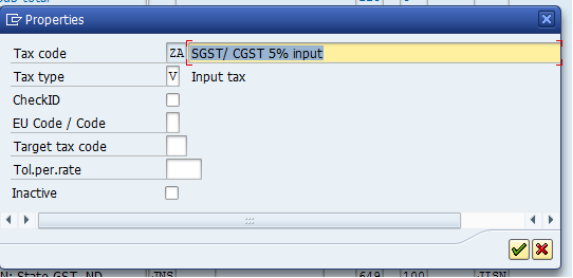
Click Enter and Save.
5) Assignment of GL Accounts to the Account Keys
Transaction Code: SM30
Give Table name – J_1IT030K_V
Click on Maintain tab
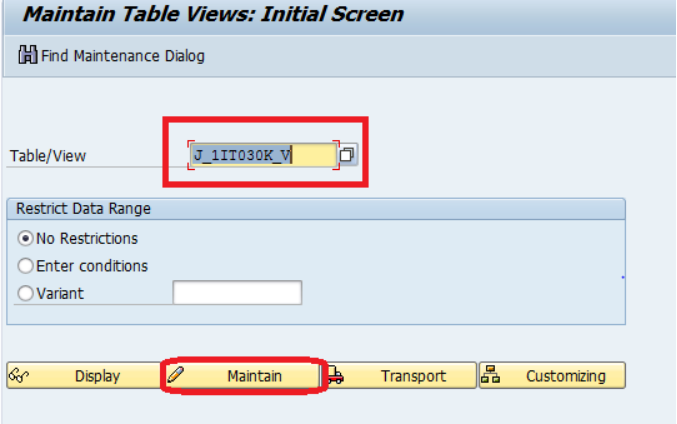
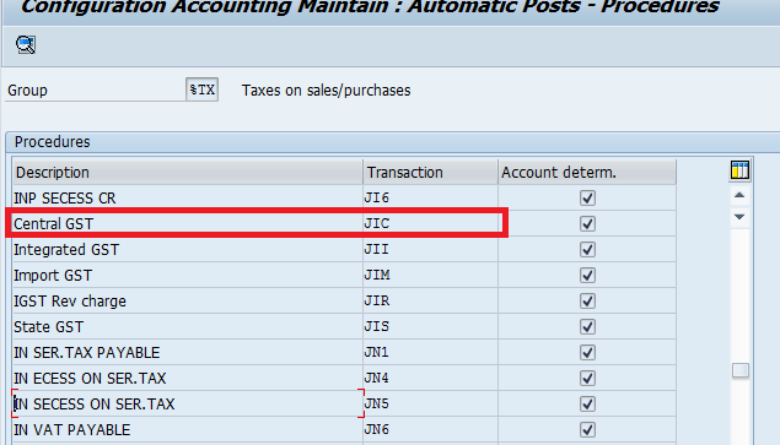
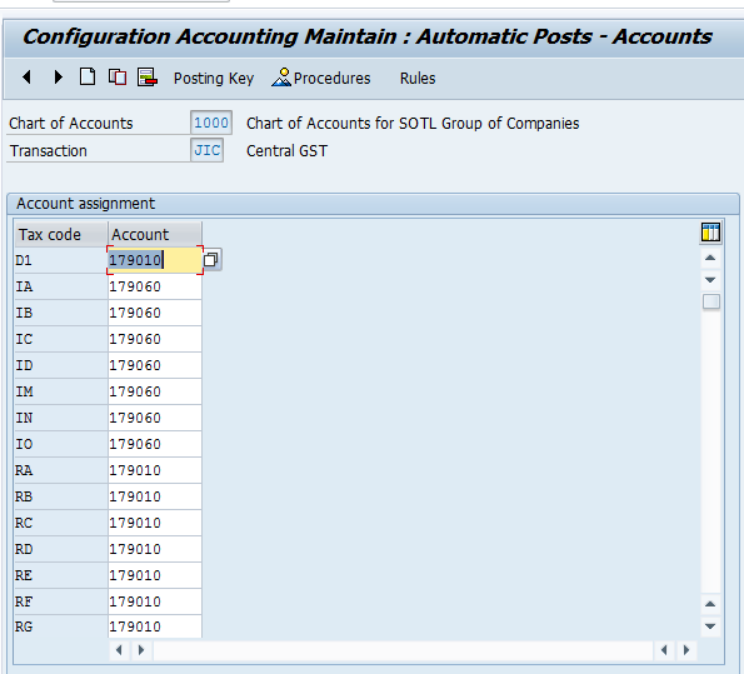
Chart of Accounts – 1000
Transaction – JIC
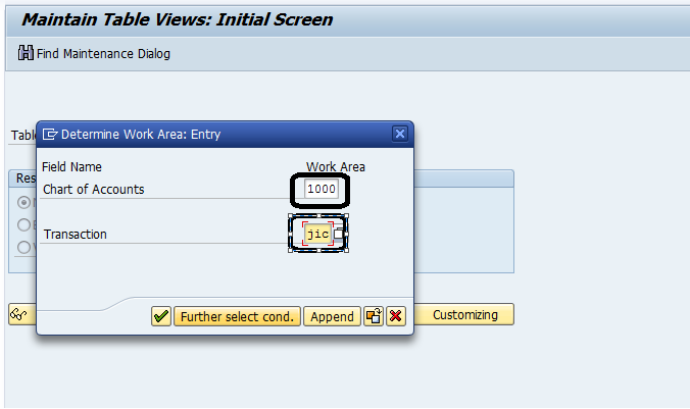
Click Enter
Select New Entries
Here we need to assign the GL accounts for each business place and tax code combination. Based on these settings, the GL accounts will get triggered while posting the transactions.
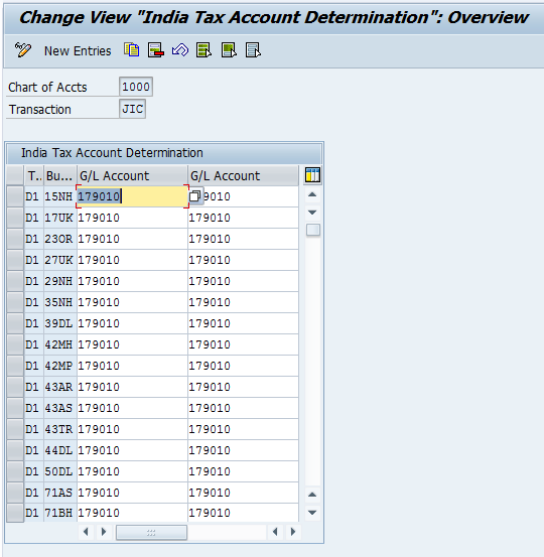
Click on SAVE
6) Assign tax codes to company codes
Path: SPRO>> IMG>>Logistics General>>>Tax on Goods Movement>>>India>>>Basic Settings>>> Determination of Excise Duty>>>Condition-Based Excise Determination>>>Assign Tax Code to Company Codes
Click on New Entries
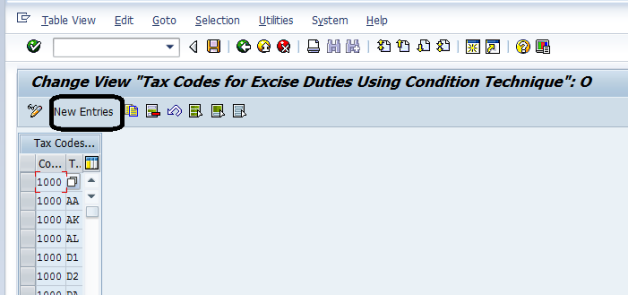
Type Co code and Tax Code
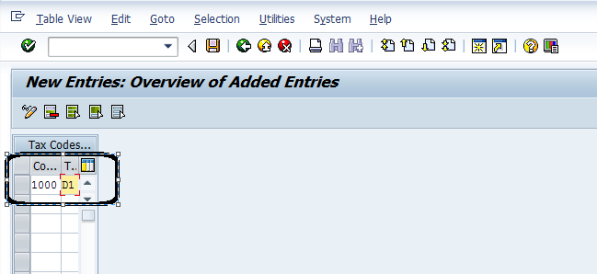
Click on Save.
7) Maintain Dummy GL account to each transaction key (OB40)
Transaction Code: OB40
Select JIC and double click on it
Maintain Tax GLs as shown below:
Click on Posting Key
Debit – 40
Credit – 50
Click on SAVE
8) Adv. Payment from Customer
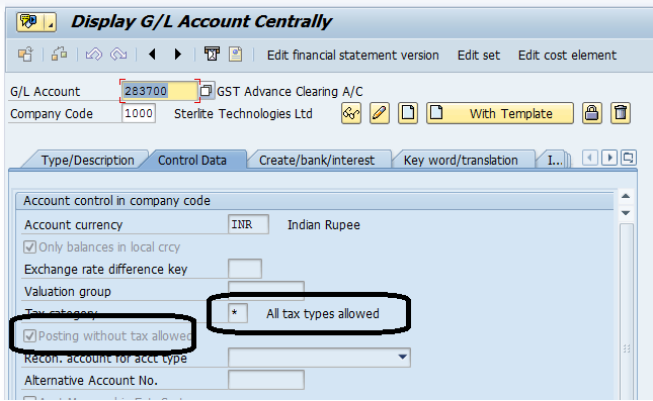
a) Creation of GL A/C – 283700 (GST Advance Clearing A/C)
Go to Control Data tab
Select “INR” Account currency
Select * in tax category
Check Posting without tax Allowed.
Go to Create/ Bank/ Interest Tab – Select G001 field status group.
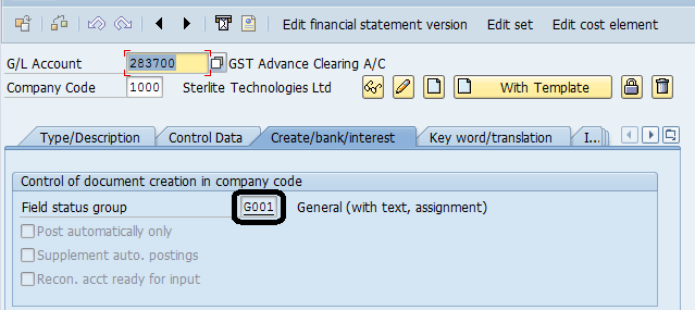
Click on SAVE.
b) Maintain Account Configuration – Special GL
Transaction Code: OBXR
Create new special GL indicator “0” and description” GST Down Payment” (Copy of “A” Special GL indicator)
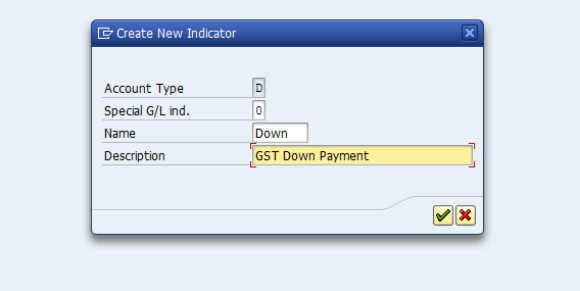
Click on Save.
Double Click on “0” special GL indicator and add “0” in output clearing

c) Maintain Account Configuration – Posting Keys
Transaction code: OB41
Go to ”9” & “19” posting keys –> Click on maintain Field status
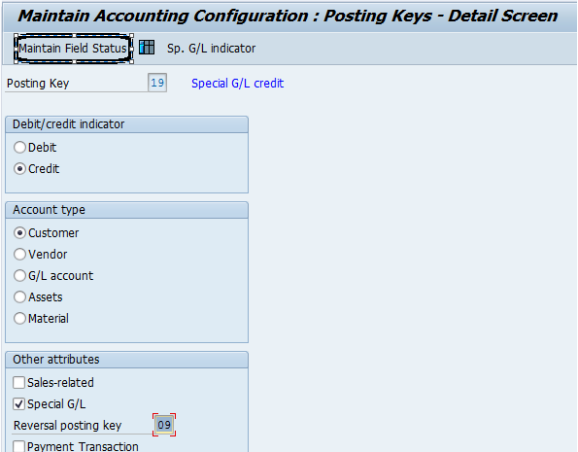
Click on taxes è select EC tax data and Gross Income Tax as optional entry
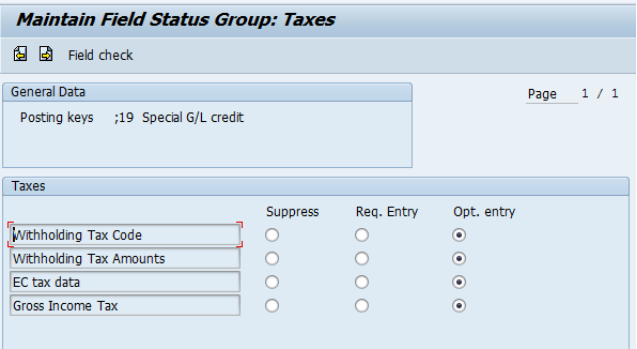
Click on SAVE.
9) ODN for Billing types
a) Maintain Document Classes
Transaction code: SM30
Enter the following Table/View – V_DOCCLS and click on edit button
Enter the country key as ‘IN’

Click on enter button. Then, click on New entries button in the next screen.
Maintain the document classes

We have created the above document classes. For your reference
b) Assign document types to Document Classes
Transaction code SM30.
Enter the following Table/View – J_1IG_V_T003_I and click on edit button.
Click on New Entries button.
Maintain the entries

NOTE: It is recommended to maintain the official document numbering control as ‘C’ which is without Date Control for country India.
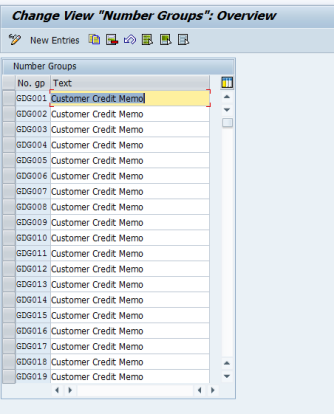
c) Maintain Number Groups
Transaction code: SM30
Enter the following Table/View – J_1IG_V_NUMGRP and click on edit button.
Click on New Entries button.
Maintain the number groups.
d) Maintain Number Ranges for Official Document
Transaction code: SNRO
Give object name as ‘J_1IG_ODN’ and click on Intervals on the tool bar.
Select the number group from F4 help and click on edit interval button
Maintain the number range intervals as per your needs. Ensure that ‘EXTERNAL’ indicator is not set.
The following screenshot is for reference only.

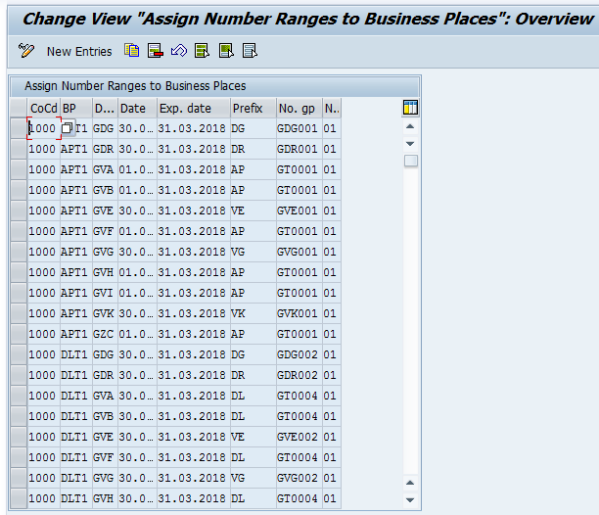
e) Assign Number Ranges to Business Places
Transaction code: SM30
Enter the following Table/View – J_1IG_V_OFNUM and click on edit button.
Click on New Entries button.
Assign the number ranges to the combination of Company code, Business Place and Official Document Class.